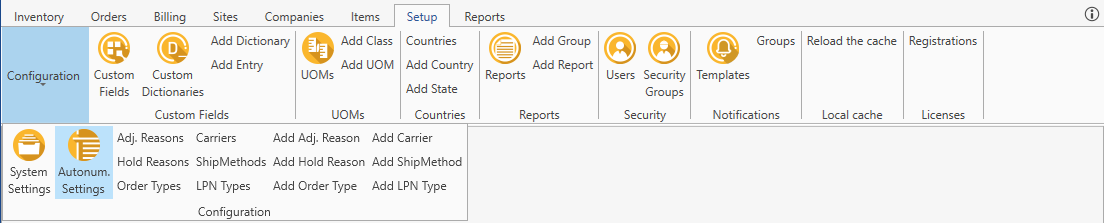
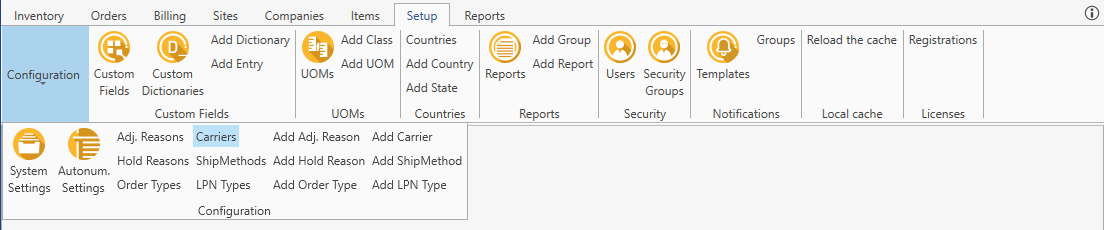
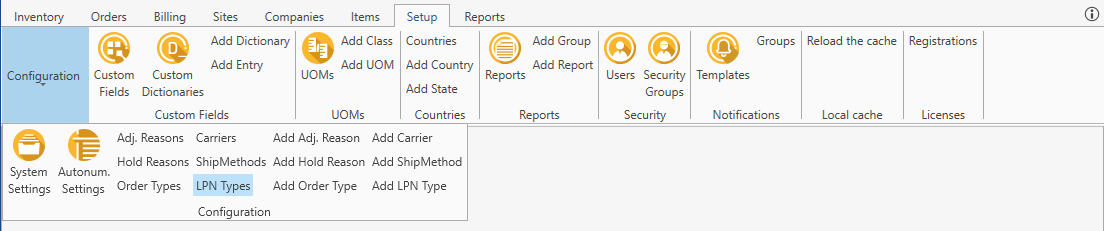
Setup Configuration
Required Permissions
- Setup System
- ability to adjust System Settings
- ability to set up Autonumbering Settings
- ability to add, view, edit, delete records within system-defined dictionaries:
- View System Setup
- ability to view System Settings and Autonumbering Settings in read-only mode
- ability to view in read-only mode records within system-defined dictionaries:
System Settings
You can adjust/view System Settings according to permissions granted:
Go to Setup section of the main menu.
Select Configuration -> System Settings menu item.

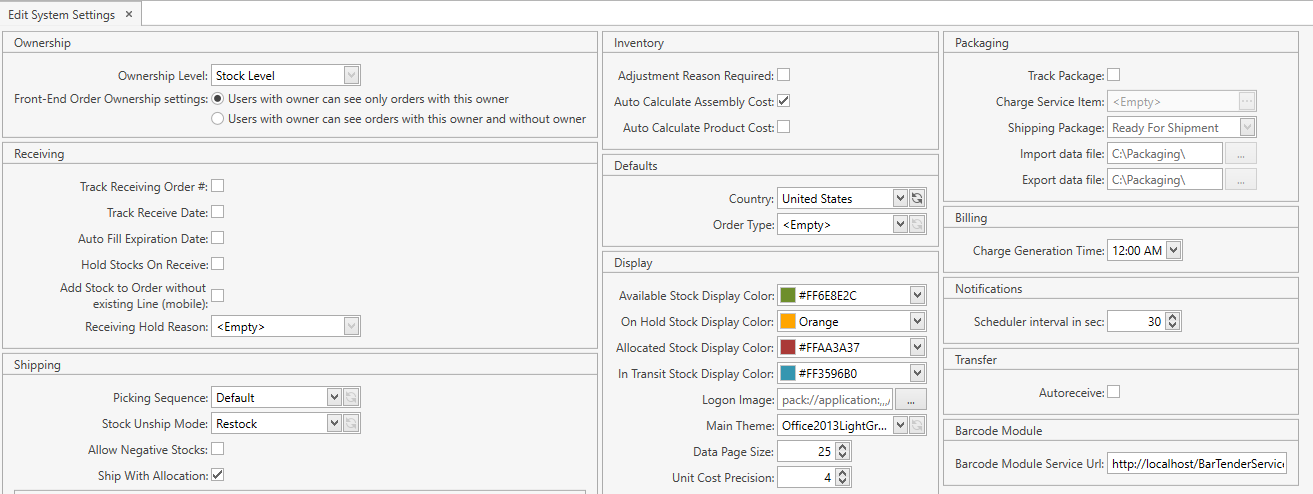
The following window opens:
- Edit the necessary System Settings.
- Click Save button.
- Click Reset button if you want to reset the unsaved changes.
Ownership
Ownership Level: the field is read-only for you. This setting is configured during the system installation setup and cannot be changed afterwards.
Possible values:
- No
- Item Level
- Stock Level
Note. If Ownership level is set up as Item Level or Stock Level, Owner field will be visible across the system. You will be able to search and filter data by Owner on inventory, item, order screens and some of the reports as well.
Front-End Order Ownership settings: if Ownership level is set up as Item Level or Stock Level, this option is enabled and defines whether orders without owner are visible for you or not on the front-end application in case an owner assigned to you (please refer to User section to see how an owner can be assigned to a user).
Receiving
Track Receiving Order #: if checked, Receiving Order Number attribute is added to Inventory grid and when you receive the stock within a Receiving Order, the system saves the Receiving Order number not only to the history log, but to the respective stock attribute as well.
Track Receive Date: if checked, when you receive the stock within a Receiving Order, the system saves the receive date not only to the history log, but to the respective stock attribute as well. By default Receive Date is set to the current date.
This flag cannot be unchecked if any contract (in any status) exists in the system with Free Storage Period attribute defined.
Auto Fill Expiration Date: if checked, the system auto populates expiration date of the stock when receiving it within a Receiving Order. If warranty is specified for the respective item, then the system calculates expiration date automatically as current date + warranty period. If there is no warranty defined for the respective item, then expiration date is set automatically to the current date.
Hold Stocks On Receive: if checked, the system sets the stock status to On Hold instead of Available when receiving the stock within Receiving Orders.
Add stock to Order without existing Line (mobile): if checked, you can add a detail to a Receiving Order even if the respective line has not been added. The system will add the respective line automatically. This setting is applied only to the mobile application.
Receiving Hold Reason: if Hold Stocks On Receive is checked, you need to select Hold Reason from the drop-down list of values defined in Hold Reasons.
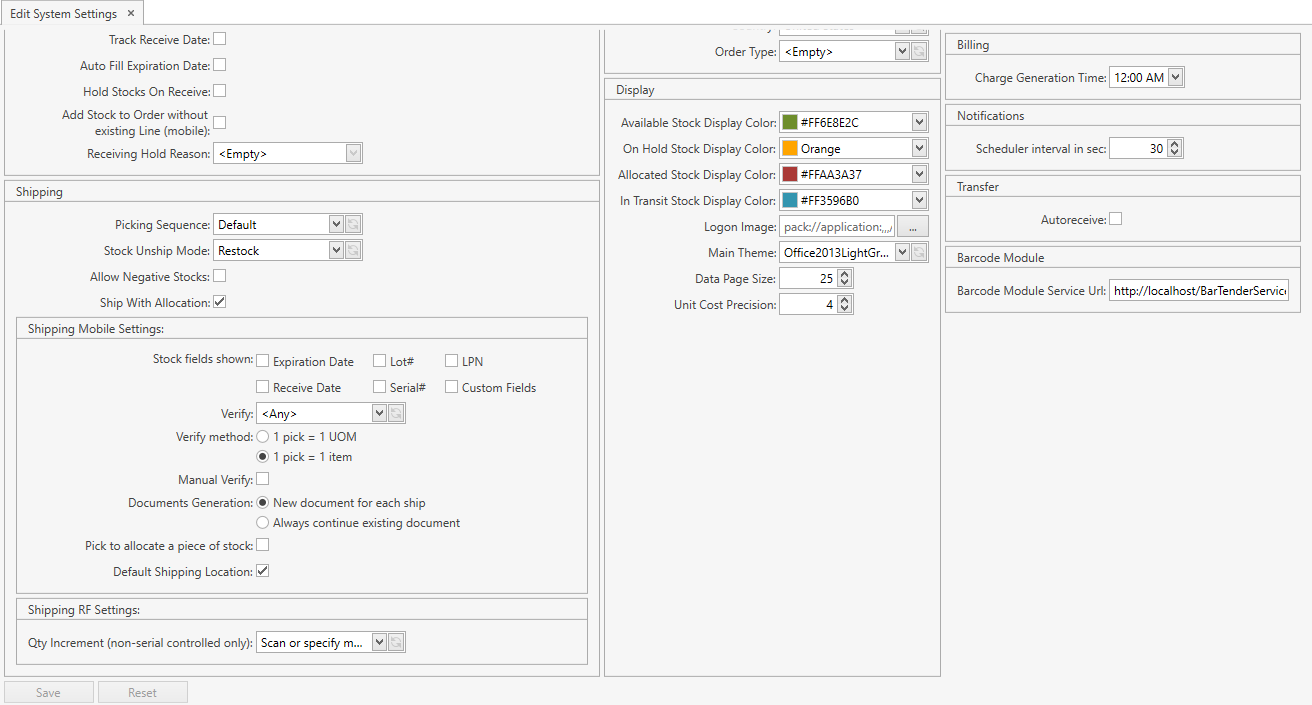
Shipping
Picking Sequence: the setting defines the sequence of picking stocks during the allocation.
Possible values:
- Default (the system doesn't apply any rules for the sequence of picking stocks)
- FIFO (first in, first out: Receive Date of stocks shall be tracked)
- LIFO (last in, first out: Receive Date of stocks shall be tracked)
- FEFO (first expire, first out: Expiration Date of stocks shall be tracked)
Picking Sequence can be overridden for a specific item. Please refer to Items section.
Stock Unship Mode: the setting is taken into account during the unship operation in Shipping Orders.
Possible values:
- Restock (the system creates a new stock with the attributes of the detail that is being unshipped)
- Reallocate (the system creates a new stock with the attributes of the detail that you are unshipping and allocates this just created stock to the line whose detail has been unshipped)
Allow Negative Stocks: if checked, the system allows you to have stocks with negative quantities. You can get a stock with the negative quantity if you ship a larger quantity of the stock than you have available on the inventory.
Ship With Allocation: the setting defines whether the system opens Line or Add Detail form for Shipping Orders when shipping from RF scanner.
Shipping Mobile Settings
Stock fields shown: you can define whether the following fields shall be displayed on the mobile device:
- Expiration Date
- Receive Date
- Lot #
- Serial #
- LPN
- Custom Fields (defined for Stock)
If checked, the respective field will be shown on the screen.
Verify: the setting defines whether it is required to verify stocks before shipping them.
Possible values:
- Any: the verification of stocks is an optional step; it's up to you whether to verify stocks or not before shipping them
- Required:
- you are not allowed to ship stocks without preliminarily verifying them
- Ship menu item is hidden on the mobile application, you can ship there only after the verification from Verify menu item
- you cannot ship unverified stocks from the desktop application as well
- No Need:
- you don't need to verify stocks at all
- Verify menu item is hidden on the mobile application
Verify method: the setting defines how you should verify stocks.
Possible values:
- 1 pick = 1 UOM – you should scan each individual item
- 1 pick = 1 item – you can pick the whole stock within one scanning
Manual Verify: if checked, you are allowed to enter manually Item Code and Qty during the verification.
Documents Generation: the setting defines whether the system shall create a new Bill of Lading (BOL) for each shipping operation.
Possible values:
- New document for each ship – the system creates a new BOL for each shipping operation
- Always continue existing document – the system updates the existing BOL while shipping (a new BOL is created only once when shipping for the first time within a Shipping Order)
Pick to allocate a piece of stock: if checked, you are allowed to allocate a part of the stock by specifying the allocated quantity.
Default Shipping Location: if checked, you can specify the default shipping location in Shipping Orders; you are also able to define the default shipping location on the site level - this shipping location will be automatically prepopulated by the system in Shipping Orders.
Shipping RF Settings
Qty Increment (non-serial controlled only): the setting defines how you can increase Qty to Ship when shipping from RF scanner.
Possible values:
- Scan or specify manually (you can increase Qty to Ship both manually and through the auto-increment by scanning each individual item (item code or item barcode) into Item field)
- Scan each individual item (you can increase Qty to Ship only through the auto-increment by scanning each individual item (item code or item barcode) into Item field)
Qty Increment method can be overridden for a specific item. Please refer to Items section.
Inventory
Adjustment Reason Required: if checked, you obligatorily need to specify Adjustment Reason while performing Add Stock, Adjust Quantity or Adjust Attributes operations.
Auto Calculate Assembly Cost: if checked, the system automatically calculates Unit Cost for an assembly (and you are not allowed to modify it) in Build Kitting Work Orders as follows:
Assembly Unit Cost = SUM (Build From Components Qty per Assembly * Unit Cost)
Auto Calculate Product Cost: if checked, the system automatically calculates Unit Cost for products (and you are not allowed to modify it) in Manufacturing Work Orders as follows:
Product Unit Cost = SUM (Allocated Components Unit Cost * Allocated Qty) / SUM (Qty to Build of all products specifications)
Defaults
Country: you can select one of the countries you created in Countries as Default. Then Country field will be automatically prepopulated across the system with this value.
Order Type: you can select the default value for Business Type field (B2B or B2C) which will be automatically prepopulated by the system in Shipping Orders.
Display
Available Stock Display Color: you can select color for displaying stocks in Available status on Inventory grid.
On Hold Stock Display Color: you can select color for displaying stocks in On Hold status on Inventory grid.
Allocated Stock Display Color: you can select color for displaying stocks in Allocated status on Inventory grid.
In Transit Stock Display Color: you can select color for displaying stocks in In Transit status on Inventory grid.
Logon Image: you can upload the company logo image, which will be displayed on the login screen of CoreIMS.
Main Theme: you can select one of 3 predefined themes, which will be used as a common style of all windows of the system.
Data Page Size: you can specify the number of rows displayed on forms. The system can display from 10 up to 500 rows on forms.
Unit Cost Precision: you can specify the number of decimal places displayed in Unit Cost field.
Packaging
Track Package: if checked, the system enables the creation and processing of packages for the integration with the external carrier system (UPS).
Charge Service Item: you can specify the item which will be used by the system to record Shipping Charges.
Shipping Package: you can select the status (New or Ready for Shipment) which the system creates packages with.
Import data file: you can define the path to the directory where the system imports data files on created packages. The external carrier system picks the data from this folder.
Export data file: you can define the path to the directory where the external carrier system places data files on packages in .csv format.
Note. Attributes Charge Service Item, Shipping Package, Import data file and Export data file are enabled and can be edited only if Track Package is checked.
Billing
Charge Generation Time: the system uses the specified time as a start time for the job of the automatic charges generation. By default the system sets time to 12:00 AM, but you can specify a custom time setting in the format HH:00 AM/PM.
Note. This setting is visible if Billing Module is activated.
Notifications
Scheduler interval in sec: time interval for notifications generated ASAP. The interval cannot be greater than 59 seconds. Refer to Notifications section for more details.
Transfer
Autoreceive: if checked, then once the transfer procedure is completed, the system will automatically make transferred stocks available on the site that receives these stocks;
if unchecked, then stocks will have In Transit status once they were transferred.
Barcode Module
Barcode Module Service Url specifies the path to the directory where Barcode Module App used for label printing is placed.
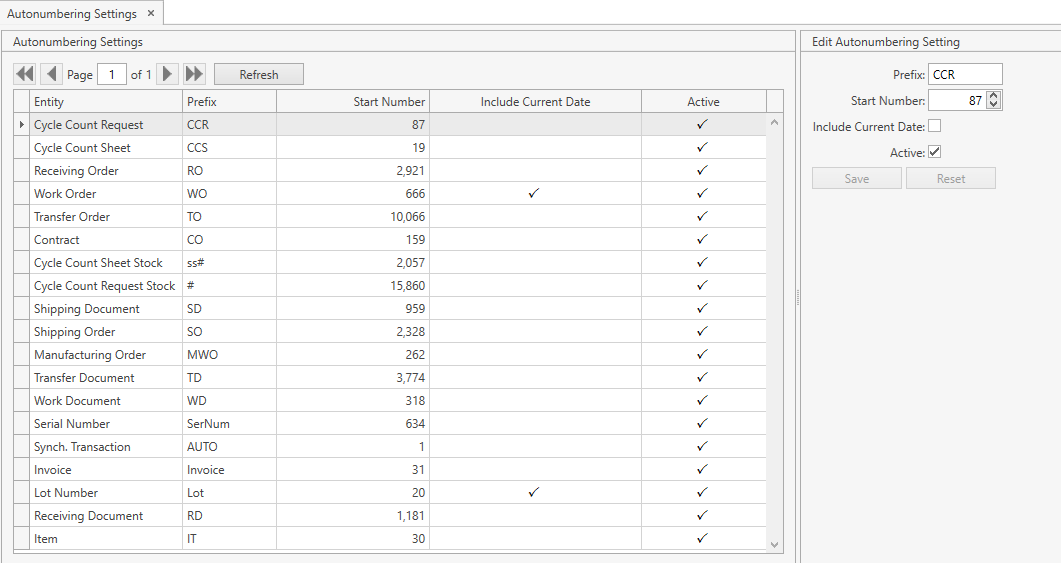
Autonumbering Settings
The system supports Autonumbering Settings for the following entities:
- Item
- Serial Number
- Lot Number
- Receiving Order
- Receiving Document
- Shipping Order
- Shipping Document
- Transfer Order
- Transfer Document
- Work Order
- Work Document
- Manufacturing Order
- Cycle Count Request
- Cycle Count Sheet
- Cycle Count Request Stock
- Cycle Count Sheet Stock
- Synch. Transaction
- Contract
- Invoice
You can edit/view these settings according to permissions granted.
View
Go to Setup section of the main menu.
Select Configuration -> Autonum. Settings menu item.
The following window opens:
Use navigation buttons
 to switch the pages of the grid.
You can also customize the view of the grid and use Ctrl+F for searching.You can update the list of displayed settings with the up-to-date data from the database by clicking Refresh button.
Edit
- Select Configuration -> Autonum. Settings menu item from Setup tab of the main menu.
- Click on the necessary entity record you want to edit the autonumbering setting for. The respective Edit Autonumbering Setting frame pops up:
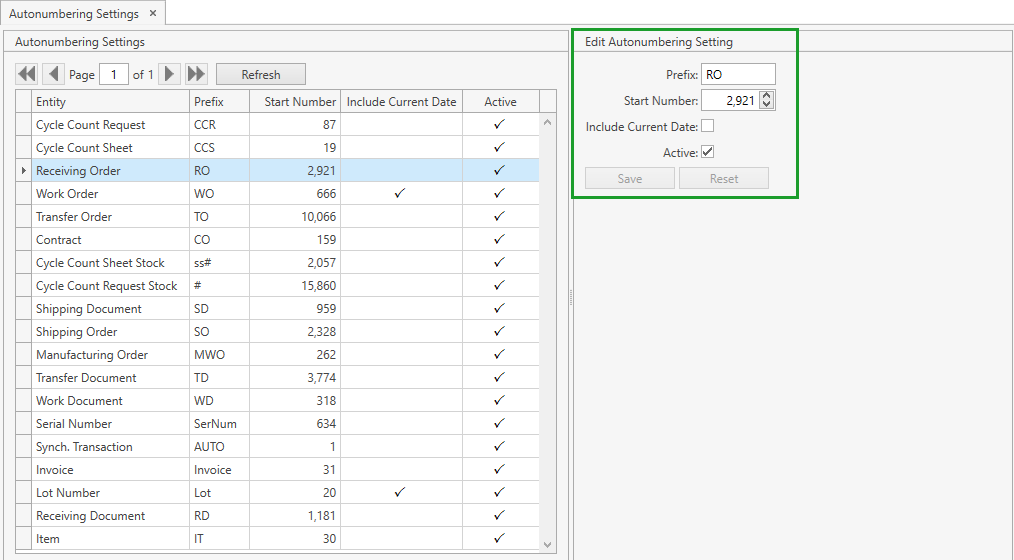
- Edit all the necessary attributes:
- Prefix: used as a beginning of the generated number
- Start Number: a number which the system starts numbering from
- Include Current Date: if checked, the system includes the current date into the autogenerated number
- Active: if checked, the system applies the setting to auto number the respective entity according to the following template:
<Prefix><YY><MM><DD><Number>, where<YY><MM><DD>- the current date that is included in the number if the flag Include Current Date is checked.
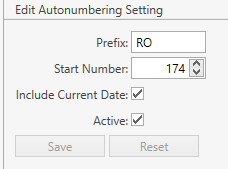
Example. If today is May 13, 2020, then for the autonumbering settings displayed below:
the system will generate the number RO200513174, the next one (if generated on the same day) will be RO200513175, etc.
- Click Save button.
- Click Reset button if you want to reset the unsaved changes.
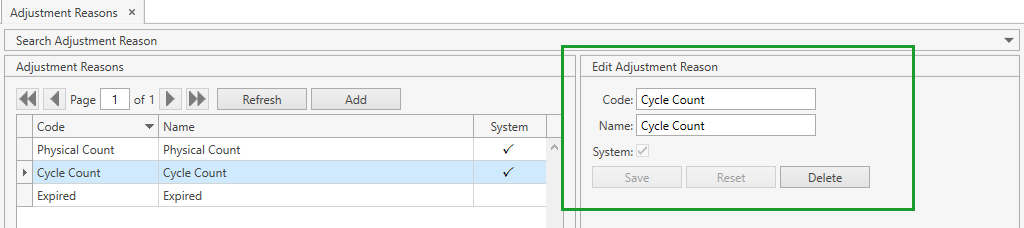
Adjustment Reasons
View
Go to Setup section of the main menu.
Select Configuration -> Adj. Reasons menu item:
The following window opens:

Use navigation buttons
 to switch the pages of the grid.
You can also customize the view of the grid and use Ctrl+F for searching.If needed, search adjustment reasons by available filters:
- You can also search by the beginning of Code/Name and set checkboxes to one of three states for searching.
- Click Apply Filter button.
- Reset previously specified filter criteria by clicking Reset Filter button.
- If needed, collapse/expand the filter area.
You can update the list of displayed adjustment reasons with the up-to-date data from the database by clicking Refresh button.
Add
- Select Configuration -> Adj. Reasons menu item from Setup tab of the main menu.
- Click Add. The following frame will show up:

Note. Alternatively, you can reach the same window from Setup section of the main menu: click Configuration -> Add Adj. Reason.
- Specify Code and Name for a new adjustment reason.
- Code is required.
- Click Save button.
- Click Reset button if you want to cancel adding of a new adjustment reason.
Edit
- Select Configuration -> Adj. Reasons menu item from Setup tab of the main menu.
- Click on the necessary adjustment reason on the grid and then click Edit button or, if the filter area is collapsed, simply click on the necessary record on the grid. The following frame will show up:
- Edit all the necessary attributes.
- Click Save button.
- Click Reset button if you want to reset the unsaved changes.
Delete
- Select Configuration -> Adj. Reasons menu item from Setup tab of the main menu.
- Click on the necessary adjustment reason on the grid and then click Edit button or, if the filter area is collapsed, simply click on the necessary record on the grid. The following frame will show up:
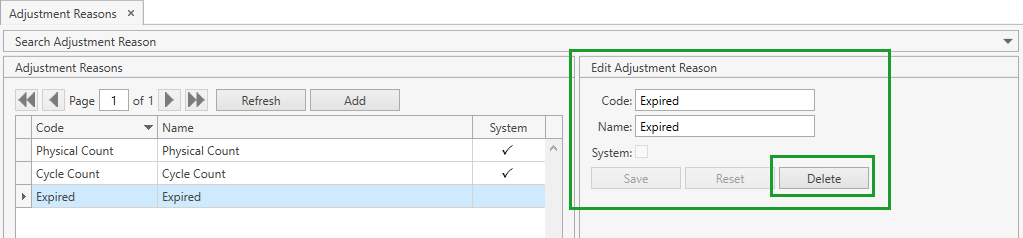
- Click Delete button.
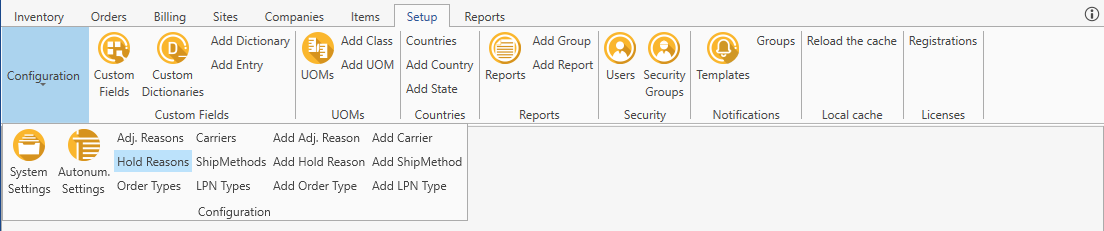
Hold Reasons
View
Go to Setup section of the main menu.
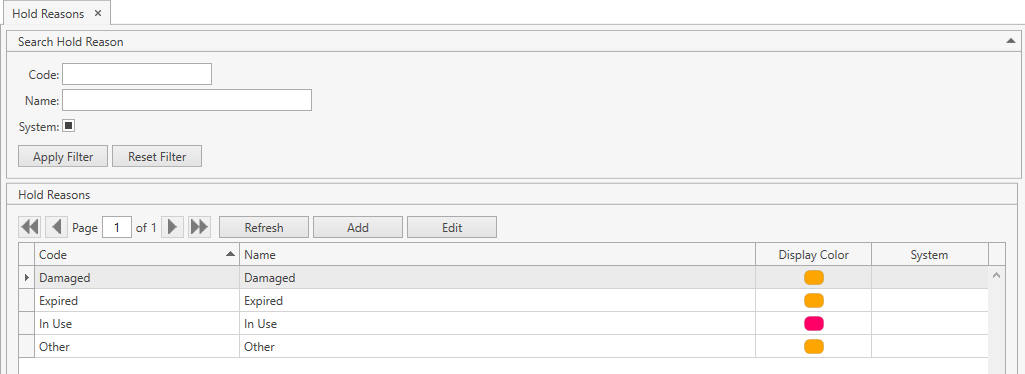
Select Configuration -> Hold Reasons menu item:
The following window opens:
Use navigation buttons
 to switch the pages of the grid.
You can also customize the view of the grid and use Ctrl+F for searching.If needed, search hold reasons by available filters:
- You can also search by the beginning of Code/Name and set checkboxes to one of three states for searching.
- Click Apply Filter button.
- Reset previously specified filter criteria by clicking Reset Filter button.
- If needed, collapse/expand the filter area.
You can update the list of displayed hold reasons with the up-to-date data from the database by clicking Refresh button.
Add
- Select Configuration -> Hold Reasons menu item from Setup tab of the main menu.
- Click Add. The following frame will show up:
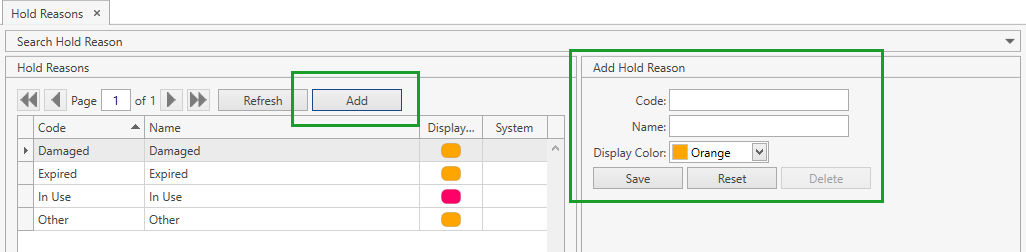
Note. Alternatively, you can reach the same window from Setup section of the main menu: click Configuration -> Add Hold Reason.
- Specify Code, Name and Display Color for a new hold reason.
- Code is required.
- Click Save button.
- Click Reset button if you want to cancel adding of a new hold reason.
Edit
- Select Configuration -> Hold Reasons menu item from Setup tab of the main menu.
- Click on the necessary hold reason on the grid and then click Edit button or, if the filter area is collapsed, simply click on the necessary record on the grid. The following frame will show up:
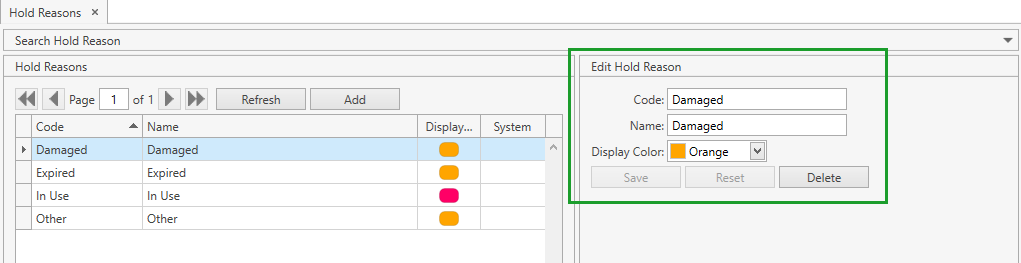
- Edit all the necessary attributes.
- Click Save button.
- Click Reset button if you want to reset the unsaved changes.
Delete
- Select Configuration -> Hold Reasons menu item from Setup tab of the main menu.
- Click on the necessary hold reason on the grid and then click Edit button or, if the filter area is collapsed, simply click on the necessary record on the grid. The following frame will show up:
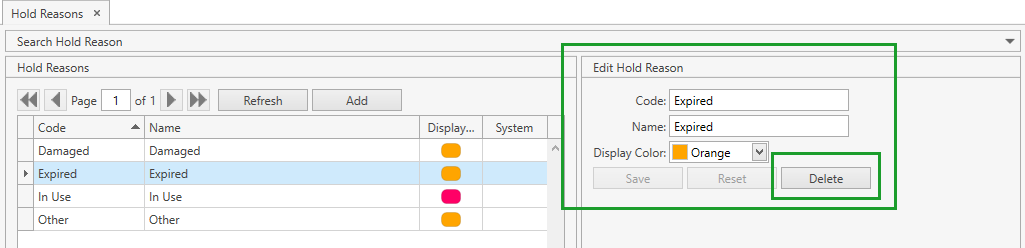
- Click Delete button.
Order Types
View
Go to Setup section of the main menu.
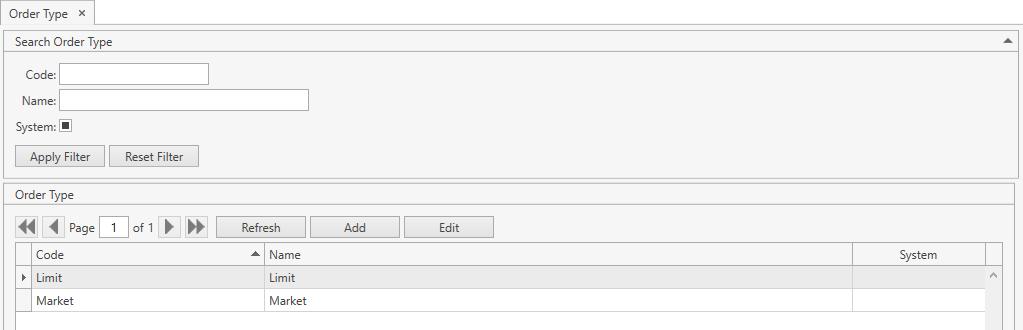
Select Configuration -> Order Types menu item:

The following window opens:
Use navigation buttons
 to switch the pages of the grid.
You can also customize the view of the grid and use Ctrl+F for searching.If needed, search order types by available filters:
- You can also search by the beginning of Code/Name and set checkboxes to one of three states for searching.
- Click Apply Filter button.
- Reset previously specified filter criteria by clicking Reset Filter button.
- If needed, collapse/expand the filter area.
You can update the list of displayed order types with the up-to-date data from the database by clicking Refresh button.
Add
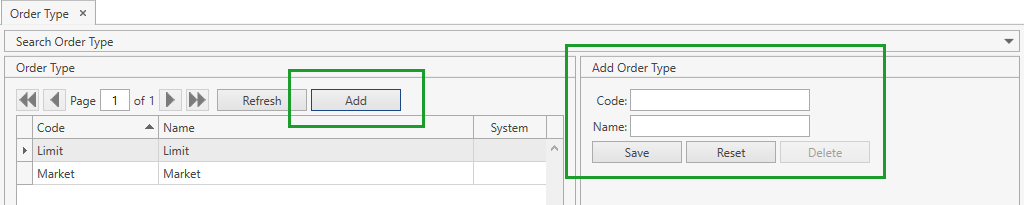
- Select Configuration -> Order Types menu item from Setup tab of the main menu.
- Click Add. The following frame will show up:
Note. Alternatively, you can reach the same window from Setup section of the main menu: click Configuration -> Add Order Type.
- Specify Code and Name for a new order type.
- Code is required.
- Click Save button.
- Click Reset button if you want to cancel adding of a new order type.
Edit
- Select Configuration -> Order Types menu item from Setup tab of the main menu.
- Click on the necessary order type on the grid and then click Edit button or, if the filter area is collapsed, simply click on the necessary record on the grid. The following frame will show up:

- Edit all the necessary attributes.
- Click Save button.
- Click Reset button if you want to reset the unsaved changes.
Delete
- Select Configuration -> Order Types menu item from Setup tab of the main menu.
- Click on the necessary order type on the grid and then click Edit button or, if the filter area is collapsed, simply click on the necessary record on the grid. The following frame will show up:

- Click Delete button.
Carriers
View
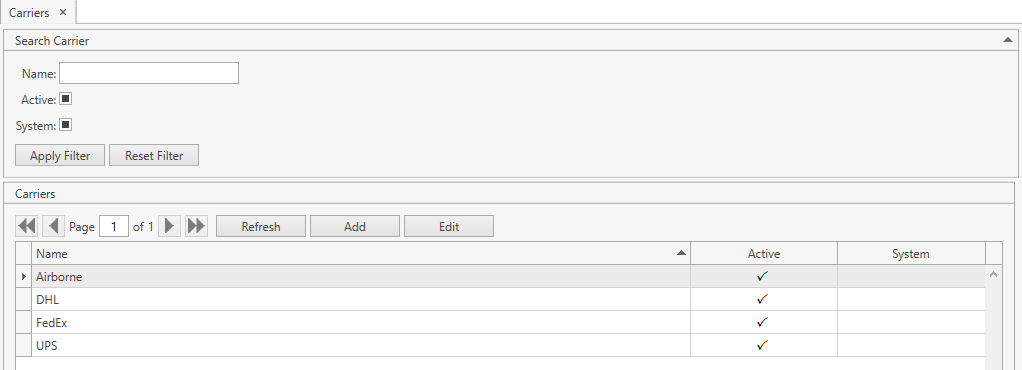
Go to Setup section of the main menu.
Select Configuration -> Carriers menu item:
The following window opens:
Use navigation buttons
 to switch the pages of the grid.
You can also customize the view of the grid and use Ctrl+F for searching.If needed, search carriers by available filters:
- You can also search by the beginning of Name and set checkboxes to one of three states for searching.
- Click Apply Filter button.
- Reset previously specified filter criteria by clicking Reset Filter button.
- If needed, collapse/expand the filter area.
You can update the list of displayed carriers with the up-to-date data from the database by clicking Refresh button.
Add
- Select Configuration -> Carriers menu item from Setup tab of the main menu.
- Click Add. The following frame will show up:
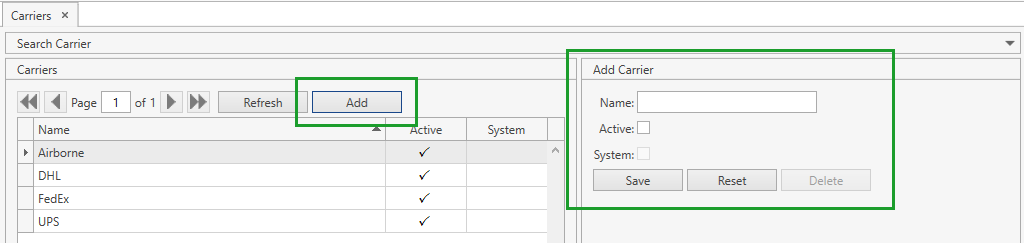
Note. Alternatively, you can reach the same window from Setup section of the main menu: click Configuration -> Add Carrier.
- Specify the necessary attributes for a new carrier.
- Name is required.
- Active: if checked, the carrier is visible across the system.
- Click Save button.
- Click Reset button if you want to cancel adding of a new carrier.
Edit
- Select Configuration -> Carriers menu item from Setup tab of the main menu.
- Click on the necessary carrier on the grid and then click Edit button or, if the filter area is collapsed, simply click on the necessary record on the grid. The following frame will show up:
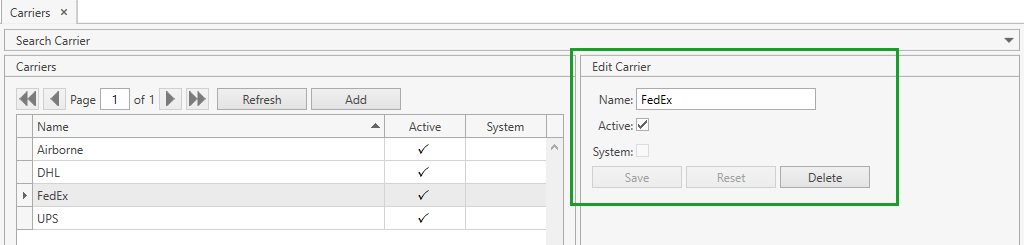
- Edit all the necessary attributes.
- Click Save button.
- Click Reset button if you want to reset the unsaved changes.
Delete
- Select Configuration -> Carriers menu item from Setup tab of the main menu.
- Click on the necessary carrier on the grid and then click Edit button or, if the filter area is collapsed, simply click on the necessary record on the grid. The following frame will show up:
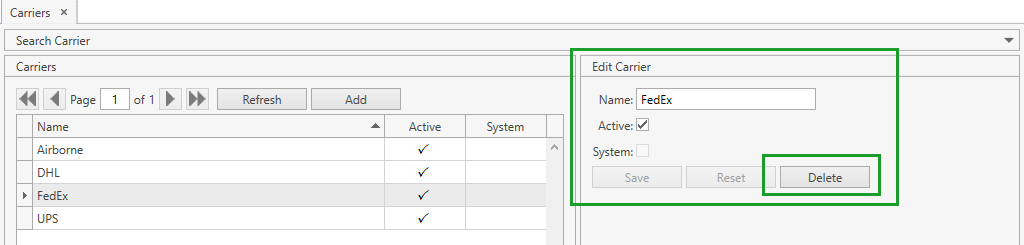
- Click Delete button.
Ship Methods
View
Go to Setup section of the main menu.
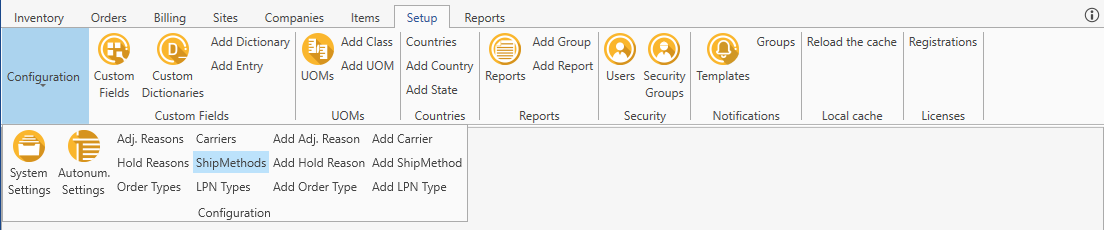
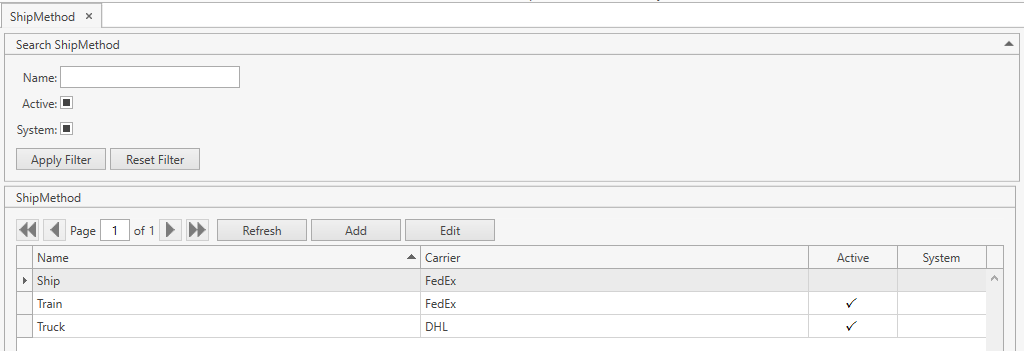
Select Configuration -> ShipMethods menu item:
The following window opens:
Use navigation buttons
 to switch the pages of the grid.
You can also customize the view of the grid and use Ctrl+F for searching.If needed, search ship methods by available filters:
- You can also search by the beginning of Name and set checkboxes to one of three states for searching.
- Click Apply Filter button.
- Reset previously specified filter criteria by clicking Reset Filter button.
- If needed, collapse/expand the filter area.
You can update the list of displayed ship methods with the up-to-date data from the database by clicking Refresh button.
Add
- Select Configuration -> ShipMethods menu item from Setup tab of the main menu.
- Click Add. The following frame will show up:
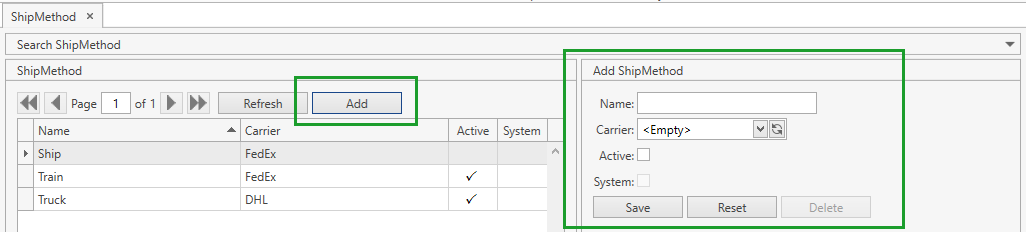
Note. Alternatively, you can reach the same window from Setup section of the main menu: click Configuration -> Add ShipMethod.
- Specify the necessary attributes for a new ship method.
- Name and Carrier are required.
- Carrier is a drop-down list of Carriers.
- Active: if checked, the ship method is visible across the system.
- Click Save button.
- Click Reset button if you want to cancel adding of a new ship method.
Edit
- Select Configuration -> ShipMethods menu item from Setup tab of the main menu.
- Click on the necessary ship method on the grid and then click Edit button or, if the filter area is collapsed, simply click on the necessary record on the grid. The following frame will show up:
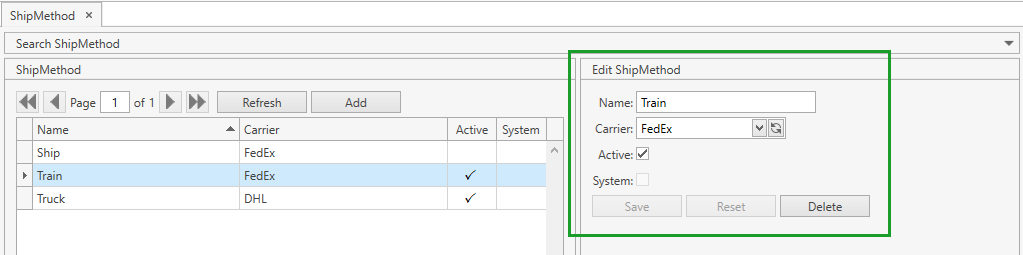
- Edit all the necessary attributes.
- Click Save button.
- Click Reset button if you want to reset the unsaved changes.
Delete
- Select Configuration -> ShipMethods menu item from Setup tab of the main menu.
- Click on the necessary ship method on the grid and then click Edit button or, if the filter area is collapsed, simply click on the necessary record on the grid. The following frame will show up:
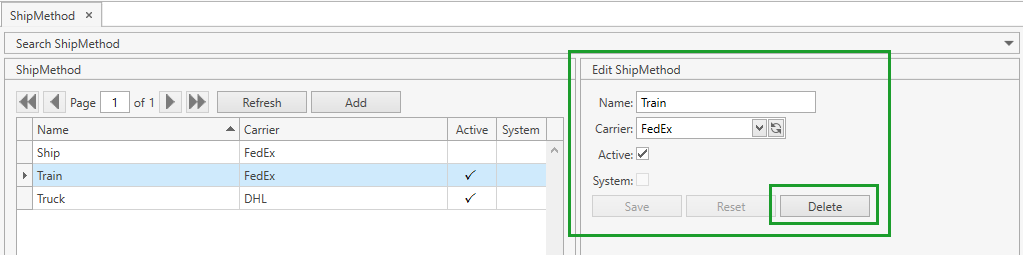
- Click Delete button.
LPN Types
View
Go to Setup section of the main menu.
Select Configuration -> LPN Types menu item:
The following window opens:

Use navigation buttons
 to switch the pages of the grid.
You can also customize the view of the grid and use Ctrl+F for searching.If needed, search LPN types by available filters:
- You can also search by the beginning of Code and set checkboxes to one of three states for searching.
- Click Apply Filter button.
- Reset previously specified filter criteria by clicking Reset Filter button.
- If needed, collapse/expand the filter area.
You can update the list of displayed LPN types with the up-to-date data from the database by clicking Refresh button.
Add
- Select Configuration -> LPN Types menu item from Setup tab of the main menu.
- Click Add. The following frame will show up:

Note. Alternatively, you can reach the same window from Setup section of the main menu: click Configuration -> Add LPN Type.
- Specify the necessary attributes for a new LPN type.
- Code is required.
- Parent: if checked, you can use LPNs of this type as a parent LPN.
- Click Save button.
- Click Reset button if you want to cancel adding of a new LPN type.
Edit
- Select Configuration -> LPN Types menu item from Setup tab of the main menu.
- Click on the necessary LPN type on the grid and then click Edit button or, if the filter area is collapsed, simply click on the necessary record on the grid. The following frame will show up:

- Edit all the necessary attributes.
- Click Save button.
- Click Reset button if you want to reset the unsaved changes.
Delete
- Select Configuration -> LPN Types menu item from Setup tab of the main menu.
- Click on the necessary LPN type on the grid and then click Edit button or, if the filter area is collapsed, simply click on the necessary record on the grid. The following frame will show up:

- Click Delete button.