Notifications
Required Permissions
- View Notification
- ability to view template groups and templates
- Modify Notification
- ability to add, view, edit and delete template groups and templates
Overview
CoreIMS supports the automatic generation of email notifications based on predefined templates and stored procedures assigned to these templates.
Stored procedure generates notifications based on the template and sends them to the necessary email address. This procedure also replaces placeholders in the template with the actual data from the database.
Templates are grouped into template groups.
The following templates and respective stored procedures are available in CoreIMS (please refer also to Templates Description section):
- Receiving Order Template
- Replenishment
- Signable BOL
View Templates Settings
Go to Setup section of the main menu.
Select Groups menu item.

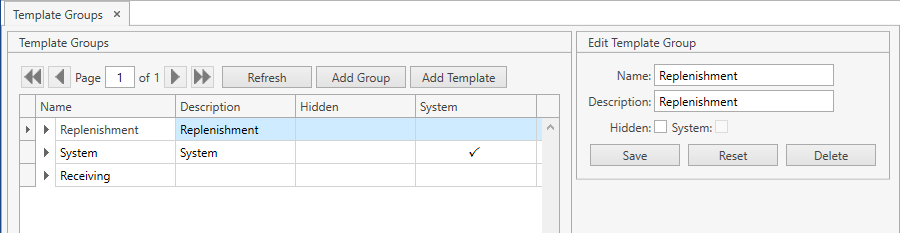
The following window with template groups opens:
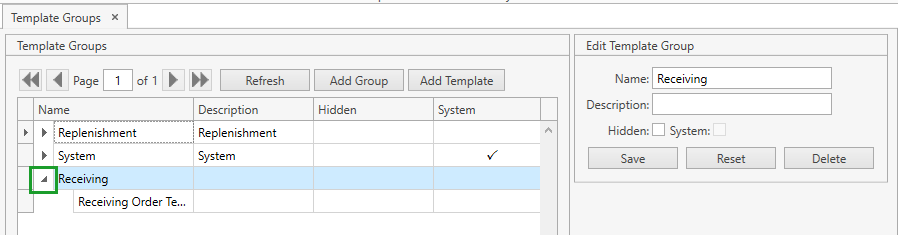
- Select a template group and click the button:
 . You will see templates that belong to the template group selected:
Use navigation buttons
 to switch the pages of the grid.
You can also customize the view of the grid and use Ctrl+F for searching.You can update the list of displayed template groups with the up-to-date data from the database by clicking Refresh button.
Template Group
Add
Select Groups menu item from Setup tab of the main menu.
Click Add Group button. The following frame will show up:
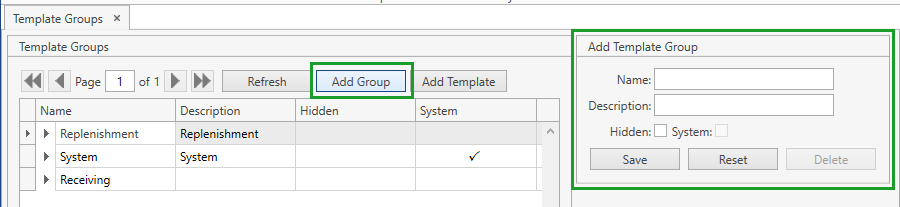
Specify the necessary attributes.
- Name is required.
- Hidden flag indicates whether a template group shall be hidden from Setup -> Templates menu section.
Click Save button.
- Click Reset button if you want to reset the unsaved changes.
Edit
Select Groups menu item from Setup tab of the main menu.
Click on the necessary template group. You can edit it within the following frame:
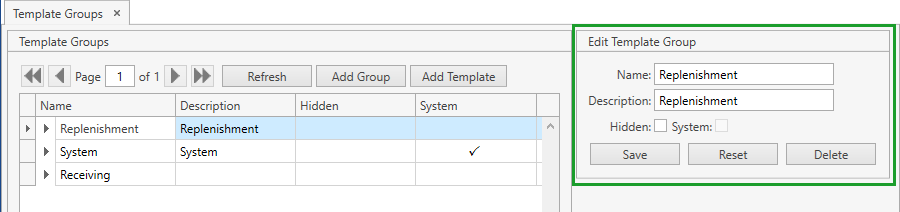
- Edit the necessary attributes.
- Click Save button.
- Click Reset button if you want to reset the unsaved changes.
- Click Delete button if you want to delete a template group.
Note. You cannot delete a template group if it is marked as System.
Template
Add
Select Groups menu item from Setup tab of the main menu.
Click on the necessary template group you want to add a template to. Then click Add Template button. The following frame will show up:
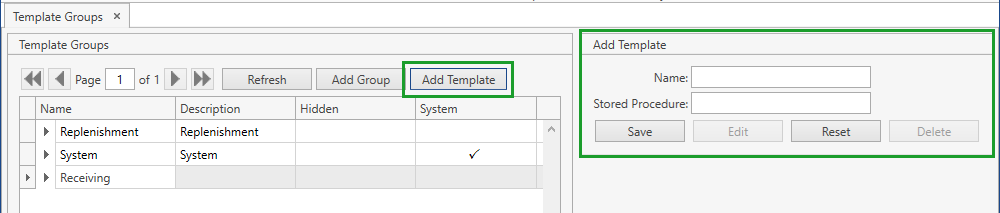
- Specify Name and Stored Procedure.
- Click Save button.
- Click Reset button if you want to reset the unsaved changes.
Edit
- Select Groups menu item from Setup tab of the main menu.
- Click on the necessary template group whose template you want to edit and then click the button:
 .
. - Click on the necessary template. You can edit it within the following frame:

- Edit the necessary attributes.
- Click Save button.
- Click Reset button if you want to reset the unsaved changes.
- Click Edit button and you will be redirected to Template Editor section.
- Click Delete button if you want to delete a template.
Note. You cannot edit or delete a template if it is marked as System.
Template Editor
Go to Setup section of the main menu.
Select Templates menu item.

The following window opens:
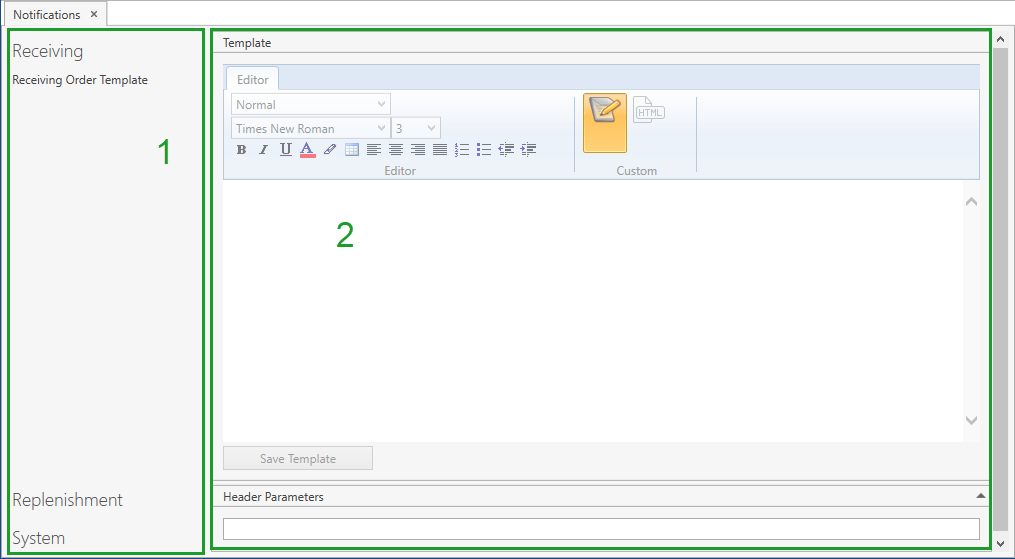
There are two frames in Template Editor:
1) Template Groups: shows template groups with templates assigned to them (please refer to View Templates Settings section).
2) Template Editor: allows you to edit the selected template.
Select a template group by clicking on it. The group will expand, showing the list of templates assigned to it.
Сlick on the necessary template. CoreIMS opens it in Template Editor:
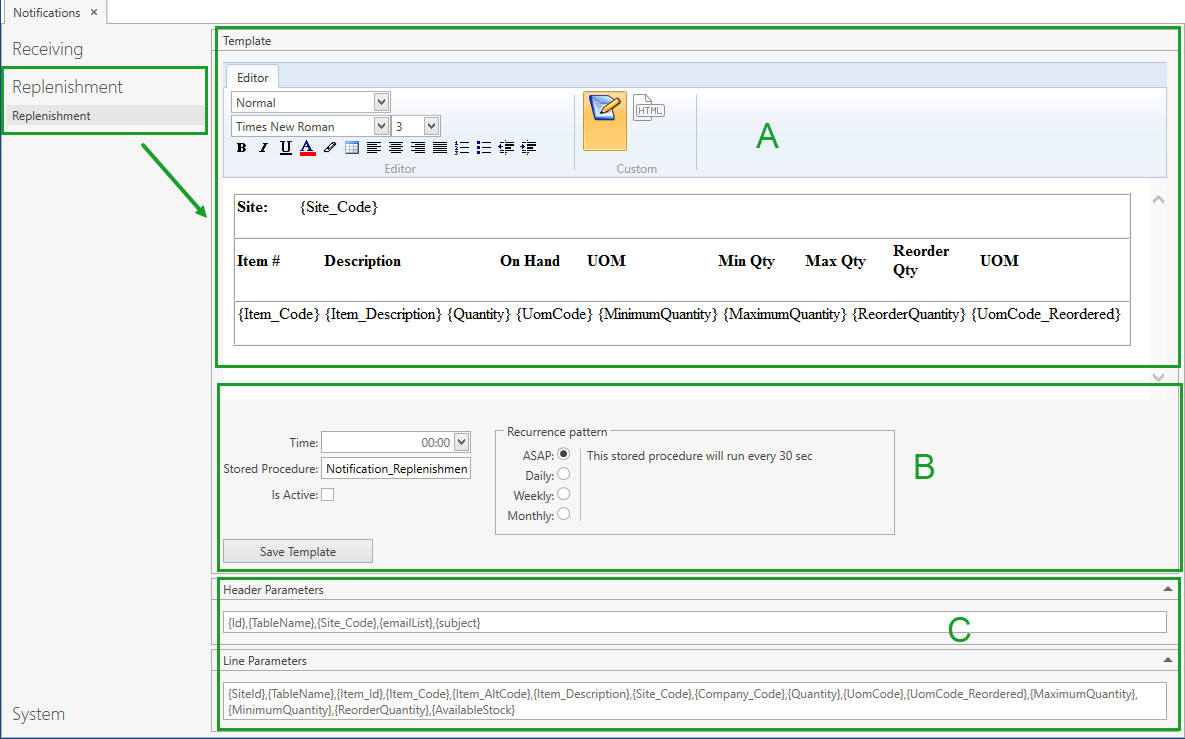
Edit the template according to the following (A, B and C sections are highlighted in the screenshot above):
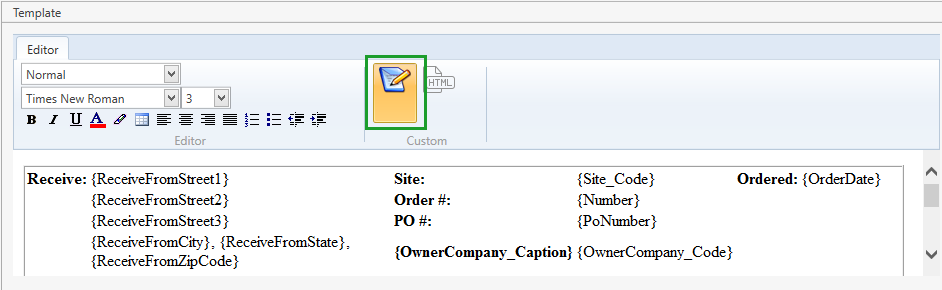
- edit the template content within the section A: you can use parameters from the section C - these parameters are defined according to the stored procedure of this particular template and replaced with the actual data from the database during the notification generation;
- define the recurrence pattern, i.e. how often CoreIMS should generate notifications, in the section B:
- ASAP: CoreIMS generates notifications with an interval defined in System Settings;
- Daily: you can specify the generation time in HH:MM format;
- Weekly: you can specify the certain days when CoreIMS shall generate notifications;
- Monthly: CoreIMS generates notifications once in a month on a day that you specify;
- activate/deactivate the notification generation by checking/unchecking Is Active flag within the section B.
Click Save Template button to apply the changes.
Please note the following:
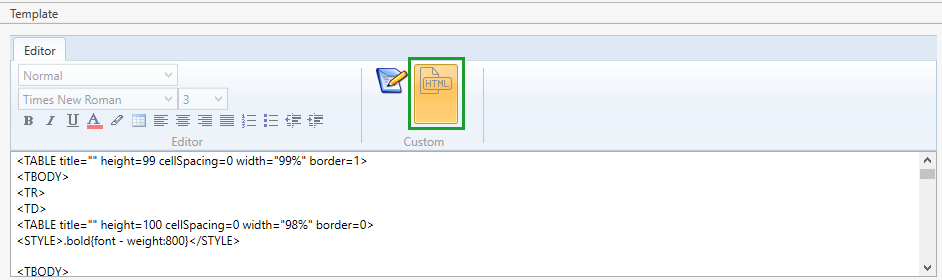
1) CoreIMS allows you to edit the template content in two modes: Plain Text and HTML. You can easily switch them:
2) The layout of Template Editor depends on the specific stored procedure. For example, for Signable BOL template there is no section where you can define how often CoreIMS should generate notifications:
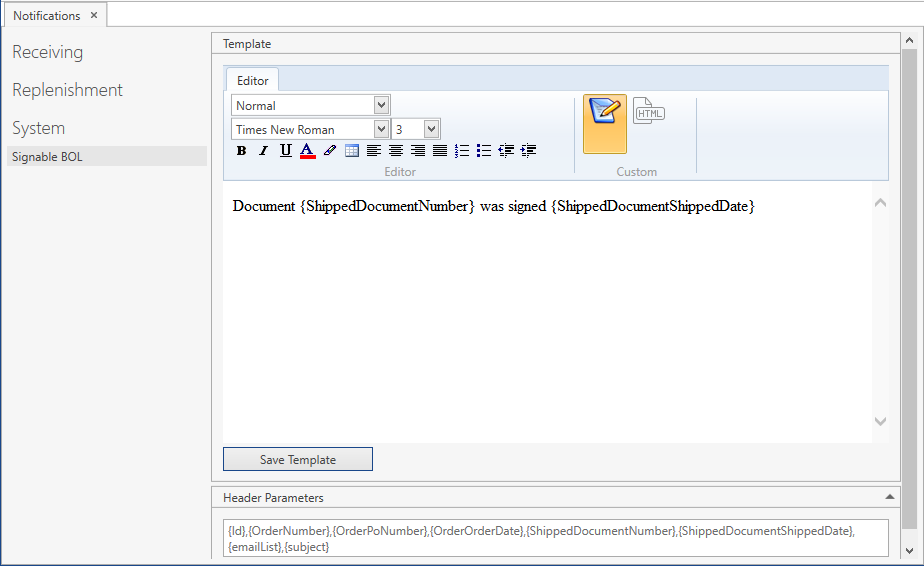
Signable BOL template is used when you send a signed BOL (Bill of Lading) via email from the Shipping Order. Please refer to Templates Description section for more details.
Templates Description
CoreIMS allows you to generate the following types of notifications out of the box:
Receiving Order Template: once you receive stocks within a Receiving Order, the newly generated receipt is sent to the vendor's email address. CoreIMS checks if there are any new receipts with a predetermined frequency. Please refer to Company Contacts section to find out how you can specify email addresses for companies.
Replenishment: CoreIMS sends notifications to the site's email address on items that need to be replenished. Please refer to Sites section to find out how you can specify email addresses for sites.
Signable BOL: once you sign a BOL (Bill of Lading) in the Shipping Order, you can send it to the customer's email address (please refer to Company Contacts section to find out how you can specify email addresses for companies). To accomplish this you need to open a Shipping Order, whose BOL you want to sign and send via email, and do the following:
- Select BOL Signable # from the drop-down list of the Shipping Order reports.
- Select the necessary BOL.
- Click Print button.
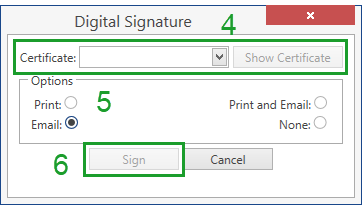
- Select a certificate for signing.
- Select one of the options:
- Print: the BOL will be signed, saved on the server and printed;
- Email: the BOL will be signed, saved on the server and sent via email to the customer;
- Print and Email: the BOL will be signed, saved on the server, printed and sent via email to the customer;
- None: the BOL will be signed and saved on the server.
- Click Assign button. If you selected Email or Print and Email at the previous step, CoreIMS sends an email to the customer with the signed BOL as an attached file.