Sites
Required Permissions
- Setup Sites
- ability to add, view, edit and delete sites, zones and locations
Search Site
- Go to Sites tab of the main menu.
- Select Search Site menu item.

You will see a list of Sites:
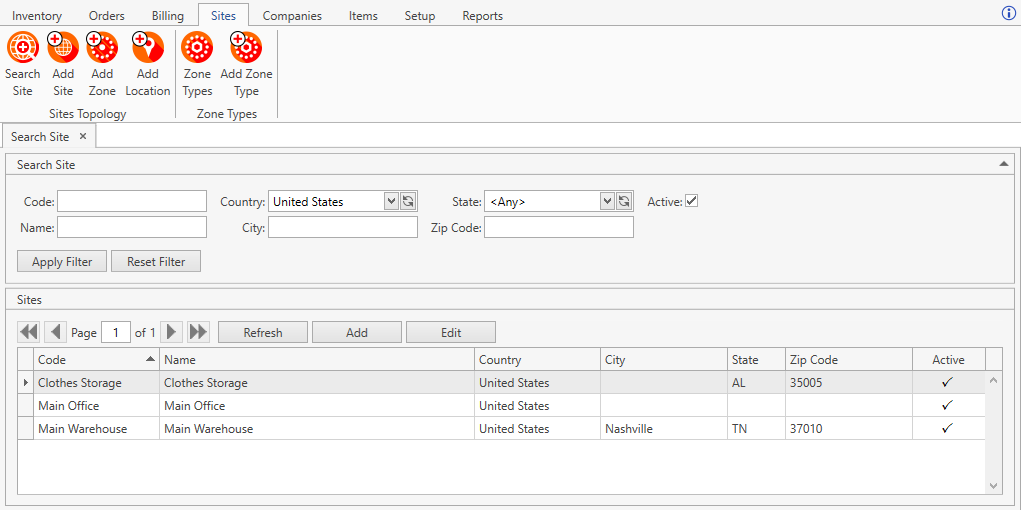
The following optional filters can be applied:
| Filter | Comment |
|---|---|
| Code | |
| Name | |
| Country | Drop-down list of values from Country Setup. For your convenience, a specific value (e.g. United States) will be populated here if the administrator defined the Default Country in System Settings. |
| City | |
| State | Drop-down list of values from Country Setup. |
| Zip Code | |
| Item | |
| Active | Checked by default. |
CoreIMS allows you to do the following when searching:
1) search by the beginning or by any part of text fields;
2) set checkboxes to one of three states for searching;
3) hide/unhide search filters;
4) collapse/expand the filter area.
- Once you specify all necessary filter criteria, click Enter or Apply Filter button.
The results that satisfy the search criteria will be loaded to Sites frame:
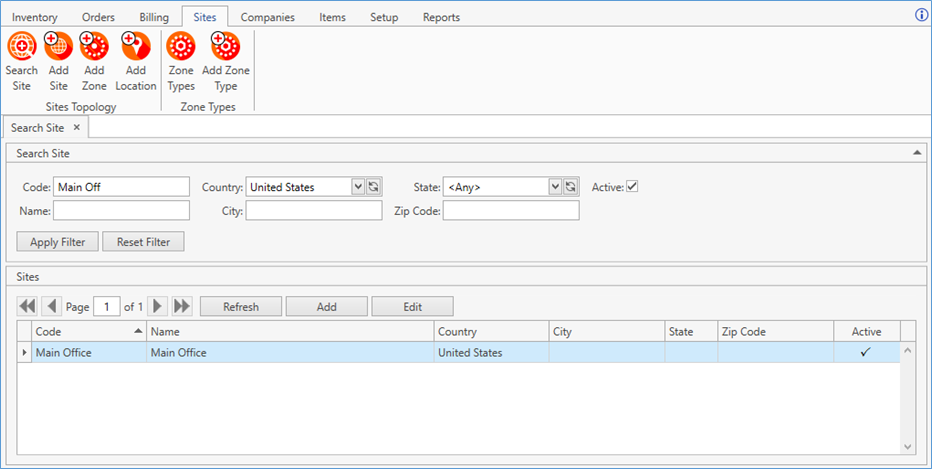
You can reset previously specified filter criteria by clicking Reset Filter button.
Use navigation buttons
 to switch the pages of the grid.
You can also customize the view of the grid and use Ctrl+F for searching.If needed, update the list of displayed Sites with the up-to-date data from the database by clicking Refresh button.
Click Add button to add a new Site. You will be redirected to Add Site window.
Select a Site and click Edit button or just double-click on the necessary Site. You will be redirected to Edit Site window.
Add Site
- Go to Sites tab of the main menu.
- Select Add Site menu item.
The following window will appear:
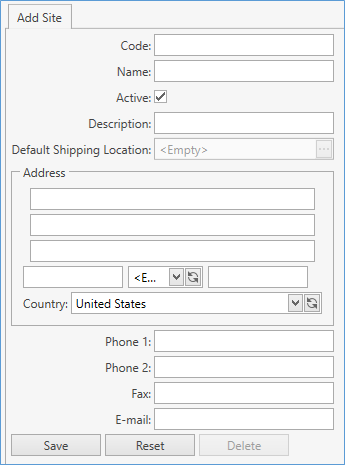
Note. Alternatively, you can access this window by clicking Add button in Search Site window.
- Sprecify all the necessary attributes:
| Attribute | Required/Optional | Comment |
|---|---|---|
| Code | Required | Must be unique across all the sites in your CoreIMS instance. |
| Name | Optional | |
| Active | Checkbox | Checked by default. |
| Description | Optional | |
| Default Shipping Location | Optional | The field is visible only when the corresponding option is enabled in System Settings. Note that the default location can be specified only for already existing Sites, so at this point the field is disabled. |
| Address | Optional | Country will be automatically prepopulated by the system if Default country is specified in System Settings. For United States you can specify the state. For other countries city and postal code are accepted. |
| Contact information | Optional | Phone, Fax, E-mail. |
- Click Save to register a new Site in CoreIMS. If successful, you will be redirected to Edit Site window.
Note. With a new Site created, CoreIMS automatically supplements it with a default zone and a location.
- Click Reset button if you want to cancel adding of a new Site.
- Delete button is not available until you've saved a new Site.
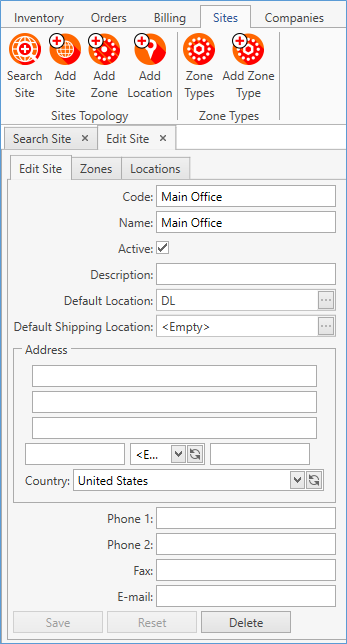
Edit Site
After saving the changes in Add Site tab, you will be redirected here.
You can also get to Edit Site tab from Search Site screen.
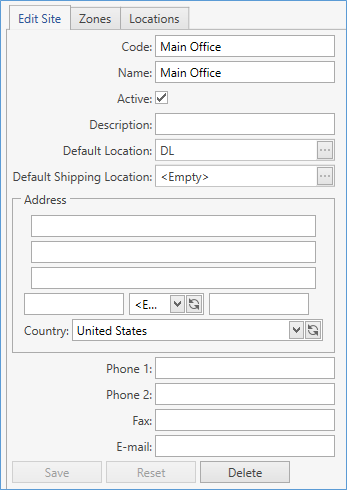
There are three tabs on this screen: Edit Site, Zones and Locations. This passage covers only Site operations, so refer to Zone List and Location List.
Here you can make changes to Site attributes. Use Reset button to clear unsaved fields.
Note. Remember that Site Code must be unique across all the Sites in this CoreIMS instance.
Warning. If you deselect Active flag, the Site will not be available in operational sections of CoreIMS, e.g. on Search Inventory screen.
When the changes are made, click Save.
CoreIMS also allows you to remove the existing Sites — use Delete button for this.
Note. You cannot delete a Site if it has at least one order in any status.
Add Zone
- Go to Sites tab of the main menu.
- Select Add Zone menu item to see the following window:
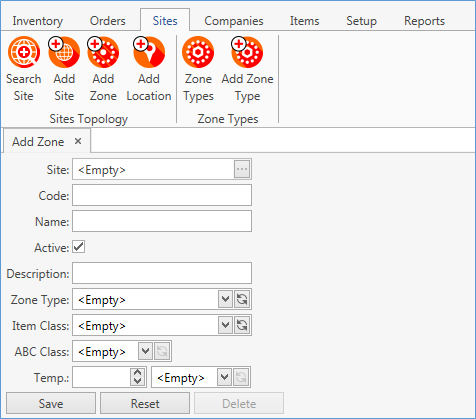
- Specify all the necessary attributes:
| Attribute | Required/Optional | Comment |
|---|---|---|
| Site | Required | |
| Code | Required | Must be unique across all the zones in this Site. |
| Name | Optional | |
| Active | Checkbox | |
| Description | Optional | |
| Zone Type | Required | |
| Item Class | Optional | |
| ABC Class | Optional | |
| Temperature | Optional |
- Save the changes. The newly created record will be listed in Zones window.
You can also reach this functionality from Edit Site screen by selecting Zones tab and clicking Add.
Zone List
Edit Site screen contains Zones tab. When selected, the following screen shows up:
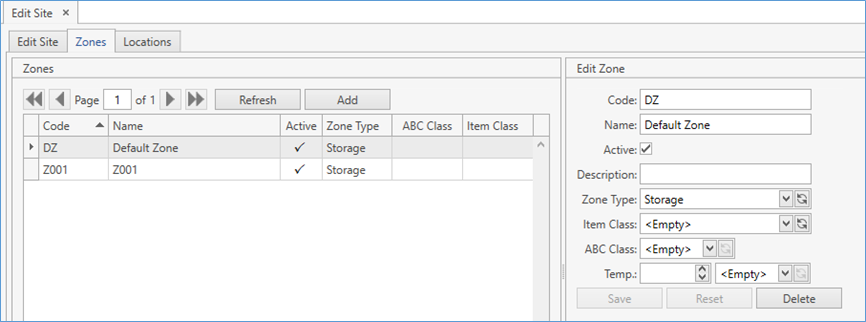
View
- Use navigation buttons to switch the pages of the grid.
You can also customize the view of the grid and use Ctrl+F for searching.
Add
When in Zone List, click Add button to see Add Zone frame to the right. For details, see Add Zone section above.
Edit
- Select the necessary Zone by clicking on it. The frame to the right reflects Zone attributes:
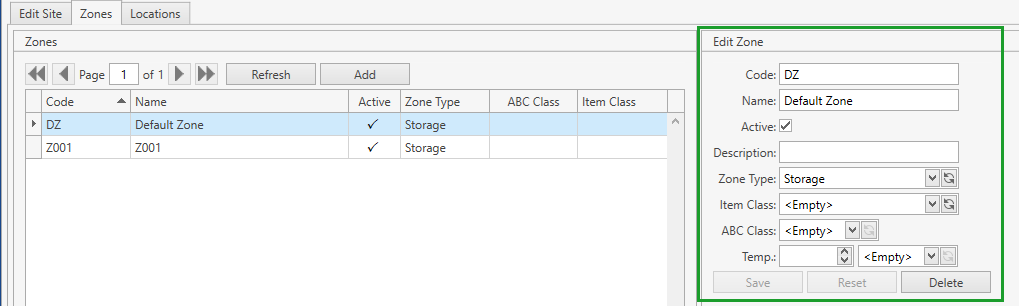
- Edit the necessary fields and save the changes.
Delete
- Select the necessary Zone by clicking on it.
- Click Delete button within the Zone attributes frame.
Note. You cannot delete a Zone if it has Locations in it.
Add Location
- Go to Sites tab of the main menu.
- Select Add Location menu item to see the following window:
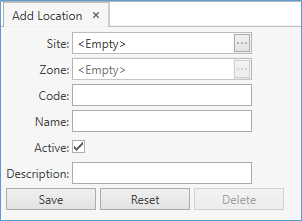
- Specify all the necessary attributes:
| Attribute | Required/Optional | Comment |
|---|---|---|
| Site | Required | |
| Zone | Required | |
| Code | Required | Must be unique across all the Locations in this Site. |
| Name | Optional | |
| Active | Required | |
| Description | Optional |
- Save the changes. You will be redirected to Edit Location window.
You can also reach this functionality from Edit Site screen by selecting Locations tab and clicking Add.
Location List
Edit Site screen contains Locations tab. When selected, the following screen shows up:
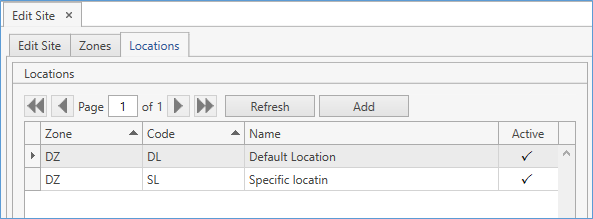
View
- Use navigation buttons to switch the pages of the grid.
You can also customize the view of the grid and use Ctrl+F for searching.
Add
When in Location List, click Add button to see Add Location frame to the right. For details, see Add Location section above.
Edit
- Select the necessary Location by clicking on it. The frame to the right reflects Location attributes:
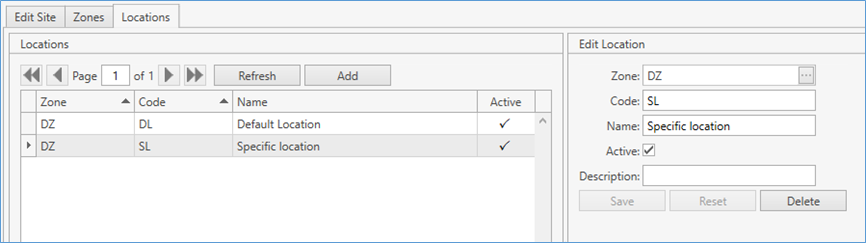
- Edit the necessary fields and save the changes.
Delete
- Select the necessary Location by clicking on it.
- Click Delete button within the Location attributes frame.
Notes.
- Default Location cannot be deleted.
- Location with stock records cannot be deleted.
- You cannot delete a Location if there is at least one order in any status with a detail associated with it.