Orders: Common Operations
- Allocate Stock
- Allocate Line / Allocate All
- Allocate LPN
- Add Assembly
- Assign Serial Numbers
- Assign To All
- Add LPN
Allocate Stock
This function allows you to manually select the stock that should be allocated to the order line. You need to do the following:
- Click Allocate Stock button. Inventory window will show up. CoreIMS prepopulates:
- Site field with Site from the order header;
- Item field with Item from the order line;
- Status field as Available;
- Quantity field with the quantity remaining to be allocated.
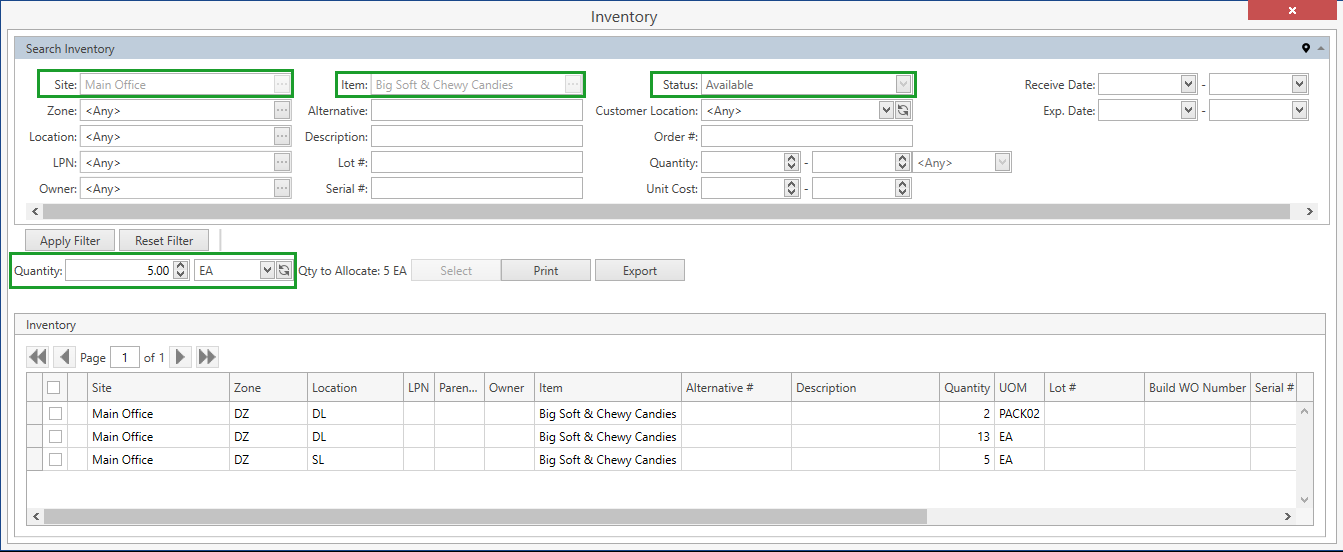
If needed, specify the necessary search criteria and click Apply Filter button to narrow down the list of stocks.
Additionally, you can do the following within Inventory window:
Use navigation buttons
 to switch the pages of the grid.
You can also customize the view of the grid, use Ctrl+F for searching, hide/unhide search filters and collapse/expand the filter area.Print or export Inventory List report displaying the data from the grid on Inventory screen. To this end use Print or Export button accordingly.
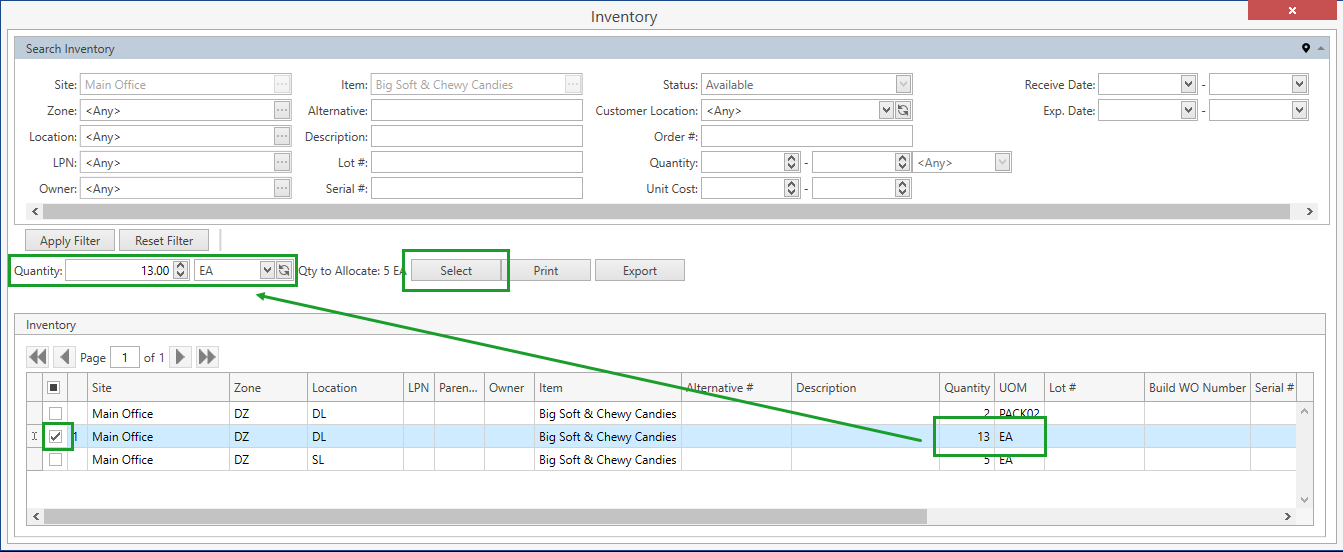
Select all the necessary stocks to be allocated. Once you select stocks, CoreIMS automatically recalculates Quantity as a sum of quantities of the selected stocks - you can manually change Quantity field, if needed.
- Click Select button to complete the operation and allocate stocks. CoreIMS will allocate stocks according to the specified Quantity even if it is greater than the quantity remaining to be allocated (Qty to Allocate):
- Alternatively, you can allocate the necessary stock by simply double-clicking on it. Then CoreIMS will allocate only Qty to Allocate or the stock quantity in case it is less than Qty to Allocate.
If you allocate only a part of the stock, it will be split up into two stocks: the first one will be allocated to the particular order and the second one will be left in Available status.
If Serial # is specified for the stock of non-serial controlled item, this stock can only be fully allocated and cannot be split.
Troubleshooting
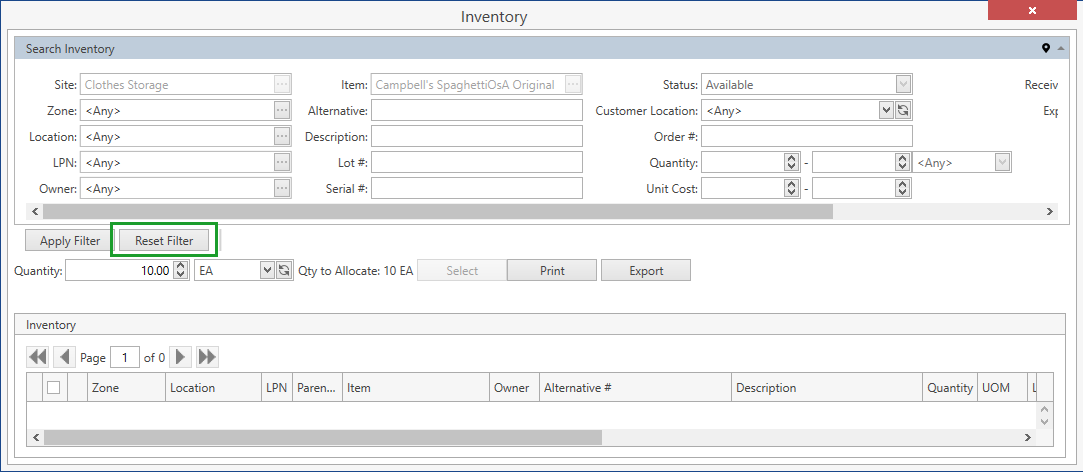
1. After clicking Allocate Stock button, there is no stock in Inventory window.
Make sure you have at least one stock in Available status at the necessary site. If no stock is physically located at the site, you won't see any in Inventory window.
Also check if you specified all the search parameters correctly in Search Inventory frame. Try to reset these parameters by clicking Reset Filter button:
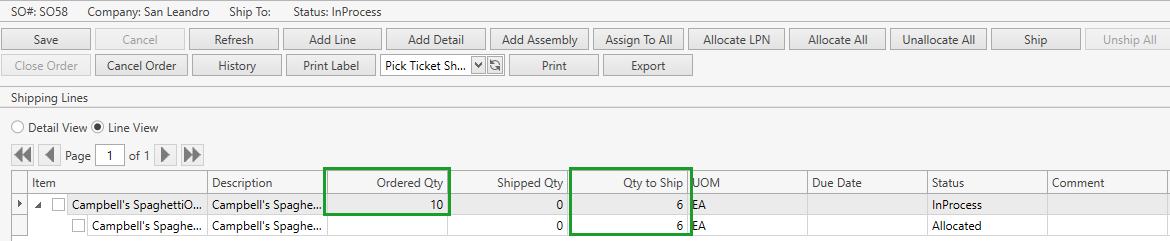
2. The system allocated less stock than expected.
If the quantity remaining to be allocated is greater than the stock quantity, only available quantity of the stock will be allocated:
Allocate Line / Allocate All
This functionality enables you to massively allocate eligible stocks in orders. Allocate Line, Allocate All or Transfer's Allocate buttons are used for this – on click, CoreIMS performs the following in the background:
Take a list of items specified in the order lines.
Example: Order SO-1 has three items ordered: Bread, Butter and Tea. This is our list of items.
Go to Site specified in the order header, search for stocks in the list from previous step. CoreIMS searches only for stocks in Available status and with positive quantity.
Example: The Site is Main Warehouse. It has the following stock records: Assorted Candy Mix, Coffee, Butter, Chicken Noodle Soup, Bread, Butter. CoreIMS in this case is interested only in Bread, Butter and Tea stocks.
CoreIMS does not blindly scan through the entire Site. Instead, it gradually searches for each item's stock in the most suitable places:
If items from the list have Forward Pick Locations configured in Item Attributes, the search starts here.
Let's say that Bread has FPL-1, Butter has FPL-2 and Tea has no FPL at all. So Bread is allocated, Butter is not currently located on FPL-2, so no allocation here. Let's try the next step.
Otherwise, other Locations in FPL Zone are scanned.
So Butter is successfully allocated on FPL-11. Tea was not allocated, go to next step.
As the last attempt, all the other Site Location are scanned, except for the ones in the Cannot Ship zone.
Tea is allocated on storage location 04A11. Now the order can be successfully processed.
More Details on allocation:
1.If Picking Sequence is defined at Item level, or specified globally in System Settings, CoreIMS picks stock records with this additional parameter:
Default. This sequence doesn’t apply any additional sorting to stocks that are stored in the selected locations.
FEFO. First Expired, First Out. This sequence applies Expiration Date Ascending sorting to stocks that are stored in the selected locations.
Example: if there are two Butter stocks on the same Location, but with expiration dates of January 20 and January 21, CoreIMS will pick the one that expires on Jan 20.
FIFO. First In, First Out. This sequence applies Receive Date Ascending sorting to stocks that are stored in the selected locations.
LIFO. Last In, First Out. This sequence applies Receive Date Descending sorting to stocks that are stored in the selected locations.
2.UOM matching rule:
Stock records with the same UOM Multiplier as the order line UOM are allocated first, then stock with Multiplier = 1, and finally stock with other UOM Multiplier in order to increase Multiplier.
Optimization rule selects maximum quantity of stock from one Location and one LPN.
CoreIMS chooses a location containing a minimal required stock quantity for allocation. If such location isn't found, the system chooses a location with maximum stock quantity.
CoreIMS chooses an LPN containing a minimal required stock quantity for allocation. If such LPN isn't found, the system chooses an LPN with maximum stock quantity.
3.Sorting Rules are the following:
The system shall sort ascending (A to Z) by Zone Code.
The system shall sort ascending by Location Code.
The system shall sort ascending by LPN Code.
Allocate LPN
This function allows you to allocate stocks located on the particular LPN even if the respective lines have not been added to the order. To accomplish this you need to do the following:
- Click Allocate LPN button. Search LPN window will show up. CoreIMS prepopulates Site field with Site from the order header:
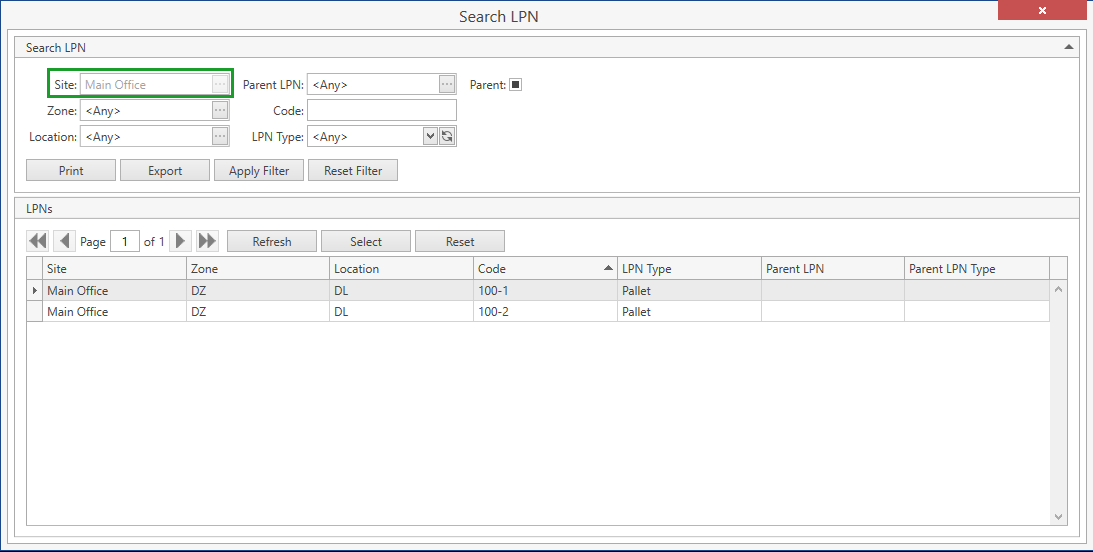
If needed, specify the necessary search criteria and click Apply Filter button to narrow down the list of LPNs.
Additionally, you can do the following within Search LPN window:
Use navigation buttons
to switch the pages of the grid.
You can also customize the view of the grid, use Ctrl+F for searching, hide/unhide search filters and collapse/expand the filter area.Print or export LPN List report displaying the data from the grid on Search LPN screen. To this end use Print or Export button accordingly.
Select an LPN by clicking on it and then on Select button or by simply double-clicking on the necessary LPN.
If the selected LPN contains an item(s) which was not added as an order line(s) to the current order, you will get the following message:
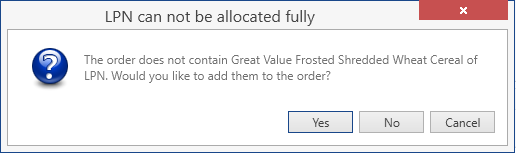
If you click Yes: CoreIMS will add this item(s) as a new order line(s) and fully allocate them.
If you click No: CoreIMS will not add this item(s) as a new order line(s). It will allocate only those stock(s) from LPN that already have the respective order line(s).
If the selected LPN contains an item(s) already added as an order line(s) to the current order and the quantity of LPN stock exceeds the quantity that is yet to be allocated for the order line, you will get the following message:
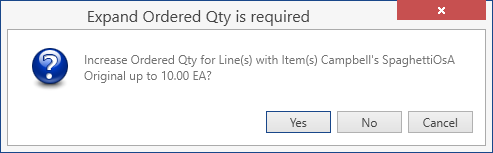
If you click Yes: CoreIMS will do the following:
- make Ordered Qty of an order line(s) equal to LPN stock quantity;
- allocate LPN stock(s) in full.
If you click No: CoreIMS will allocate LPN stock(s) with the quantity sufficient enough to cover Ordered Qty of an order line(s).
Add Assembly
This function allows you to add an assembly or its components to the order as new order lines. You need to do the following:
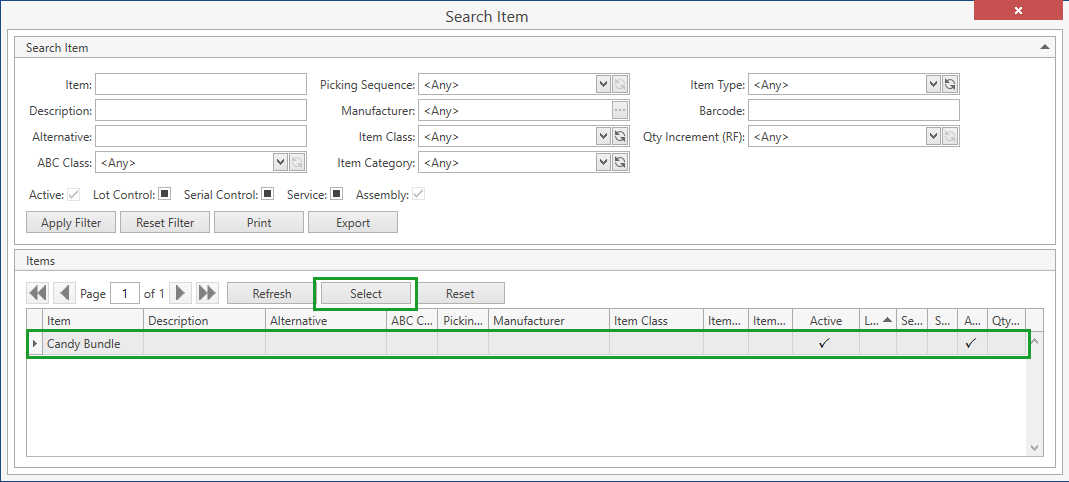
- Click Add Assembly button. Search Item window will show up where you can select an active assembly item to be added to the order:
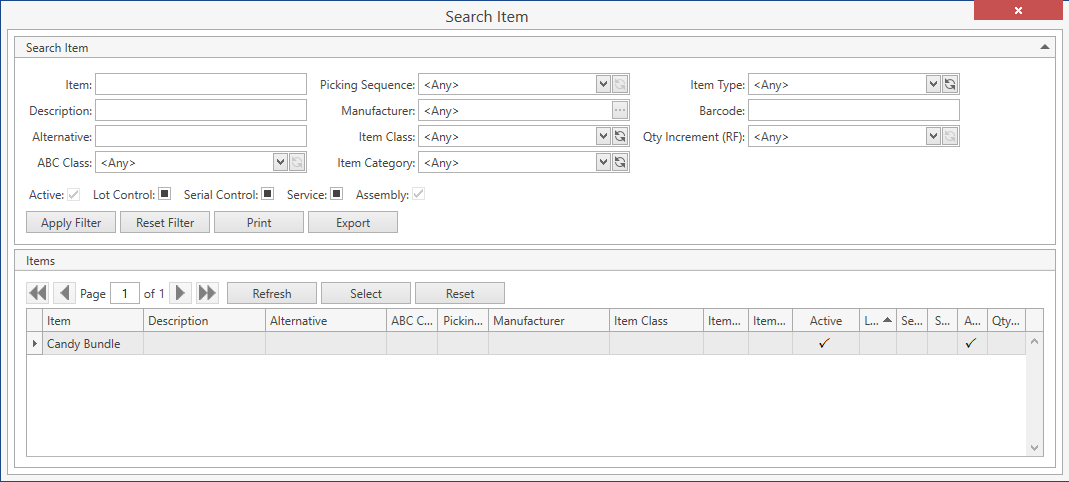
If needed, specify the necessary search criteria and click Apply Filter button to narrow down the list of items.
Additionally, you can do the following within Search Item window:
Use navigation buttons
to switch the pages of the grid.
You can also customize the view of the grid, use Ctrl+F for searching, hide/unhide search filters and collapse/expand the filter area.Print or export Item List report displaying the data from the grid on Search Item screen. To this end use Print or Export button accordingly.
Select the necessary item by clicking on it and then on Select button or by simply double-clicking on the assembly:
The following window pops up:
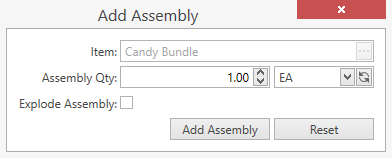
Specify the necessary Qty and UOM.
- You can also check Explode Assembly flag. Then CoreIMS will add not a new line of the selected assembly item, but new lines of all components that are specified in Bill of Materials for this item.
Click Add Assembly button to confirm adding of a new line(s) to the order.
Click Reset button if you want to cancel the whole operation.
Assign Serial Numbers
This function allows you to automatically assign serial numbers to serial-controlled items. You need to do the following:
- Click on
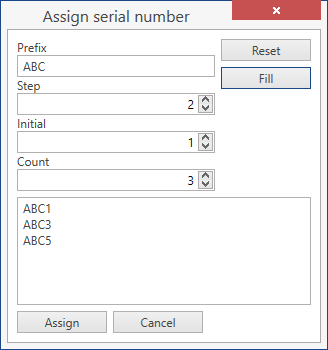
 button which is located near Serial # field. Assign serial number pop-up will show up:
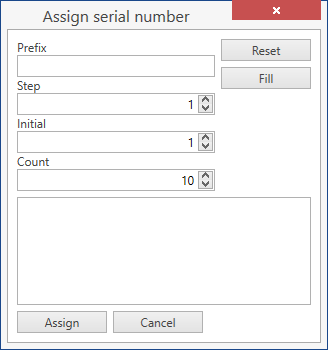
Specify the parameters of the template for the autogeneration of serial numbers:
- Prefix: this is a basis for all the generated serial numbers. E.g. ABC1, ABC3, ABC5.
- Step: 1 by default. Specify another number if you want serials to have a +n sequence. E.g. if you specify Step as 2 and Initial as 1, CoreIMS will generate numbers 1, 3 and 5.
- Initial: 1 by default.
- Count: how many serial numbers you need to generate; 10 by default.
Click Fill button to generate serial numbers according to the specified template:
- You don't necessarily need to generate serial numbers automatically. You can manually enter serial numbers in the box shown below:
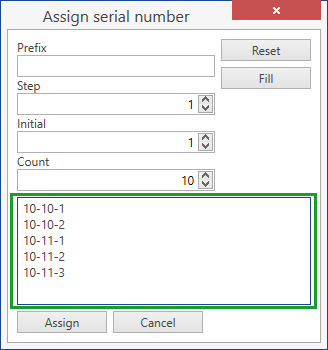
Remember that you should place each serial number in a separate line.
Click Reset button to reset serial numbers that were autogenerated/entered manually.
Click Cancel button to cancel the whole operation.
Click Assign button to have CoreIMS populate Serial # field with the specified serial numbers:

Assign To All
This function allows you to:
- assign the same attributes within one transaction to all order details in New status
- create new details for the order lines that have not been closed
You need to do the following:
- Click Assign To All button. You will see the following window with detail attributes:
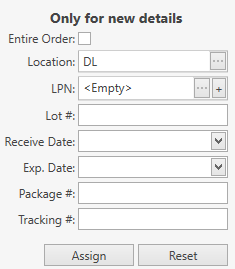
Note. Entire Order (Build All/Unbuild All in Kitting Work Orders) is checked by default if there are no details in New status in the order.
Check/Uncheck Entire Order (Build All/Unbuild All in Kitting Work Orders) flag depending on your needs:
- uncheck the flag if you want only to update already existing details in New status with a new set of attributes;
- check the flag if you want not only to update already existing details, but also to create new ones with the same set of attributes; new details will be created for lines that are not in Closed status.
Specify attributes you want the details to have. Note the following:
- CoreIMS prepopulates Location with Default Location of the Site specified in the order header.
- Package # and Tracking # attributes are not editable for you; CoreIMS automatically populates these fields during the integration with the external carrier system (UPS).
- You will be able to specify custom fields if the stock has any assigned Custom Fields.
Click Assign button to confirm the operation.
Click Reset button if you want to cancel the whole operation.
Troubleshooting
1. Assign To All button is disabled.
Assign To All button is enabled if the order is in New or In Process status and there is at least one line in the order.
2. Assign To All function didn’t create new details for the order line.
This might happen if you have already added a detail(s) to this line.
Add LPN
This function allows you to create an LPN from scratch while operating with orders. You need to do the following:
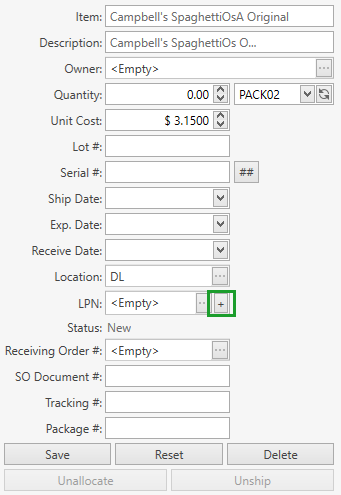
- Click '+' button next to LPN field which you can find among the detail attributes:
Add LPN window will show up:
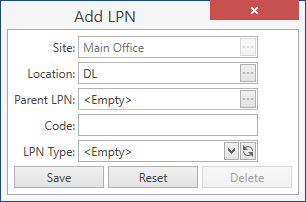
- Specify the necessary LPN attributes:
| Attribute | Required/Optional | Comment |
|---|---|---|
| Site | Required | Non-editable; CoreIMS automatically populates the field with Site from the order header. |
| Location | Required | CoreIMS automatically populates the field with Location if it is specified for the detail. |
| Parent LPN | Optional | Drop-down list of parent LPNs on the current Site and Location. |
| Code | Required | Shall be unique across the system. |
| LPN Type | Required | Drop-down list of the values defined in Configuration section. |
- Click Save button: a new LPN will be created and assigned to the current detail.
- Click Reset button if you want to cancel the whole operation.