UOMs (Units of Measurement)
Required Permissions
- Setup System
- ability to add, view, edit, delete UOMs and UOM classes
- View System Setup
- ability to view UOMs and UOM classes in read-only mode
View
Go to Setup section of the main menu.
Select UOMs menu item.

The following window with UOM classes opens:
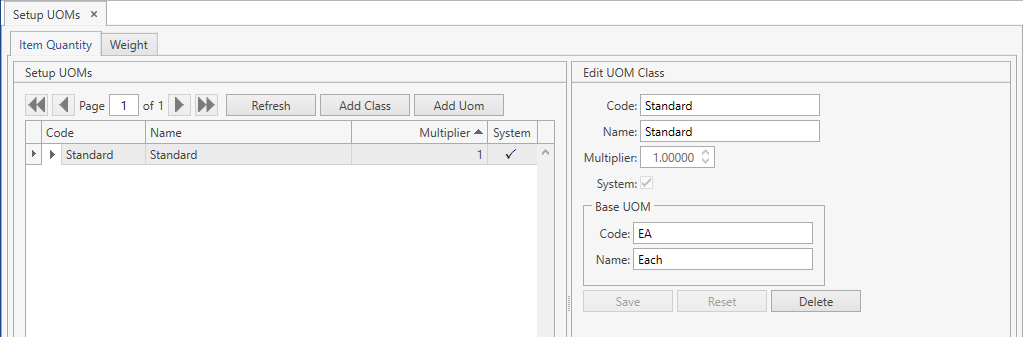
- Select a UOM class and click the button:
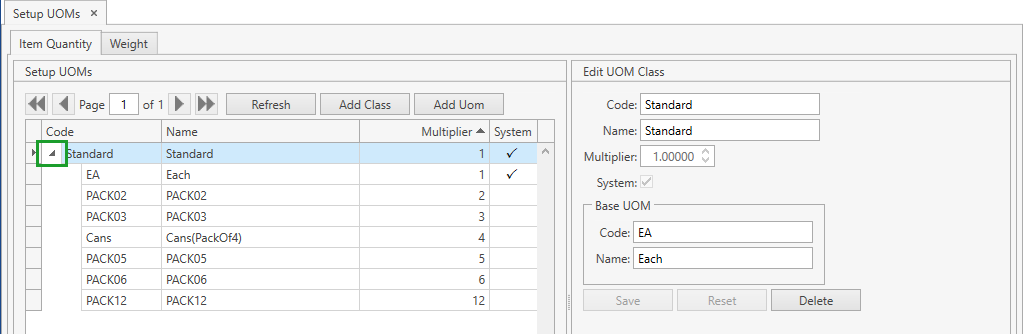
 . You will see UOMs that belong to the UOM class selected:
Use navigation buttons
 to switch the pages of the grid.
You can also customize the view of the grid and use Ctrl+F for searching.You can update the list of displayed UOM classes with the up-to-date data from the database by clicking Refresh button.
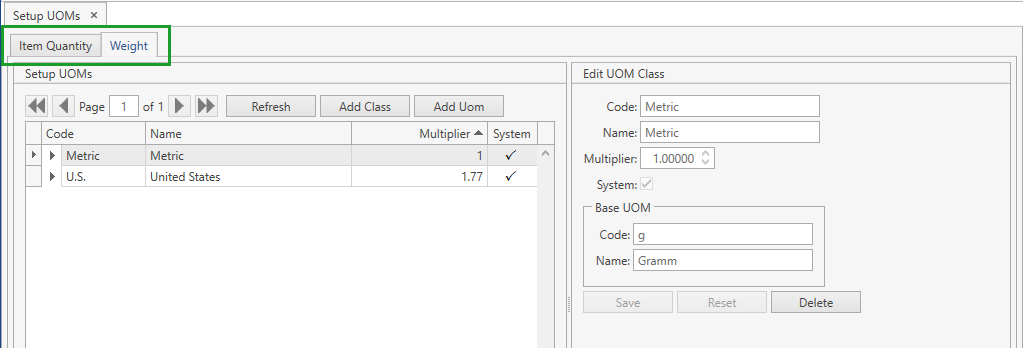
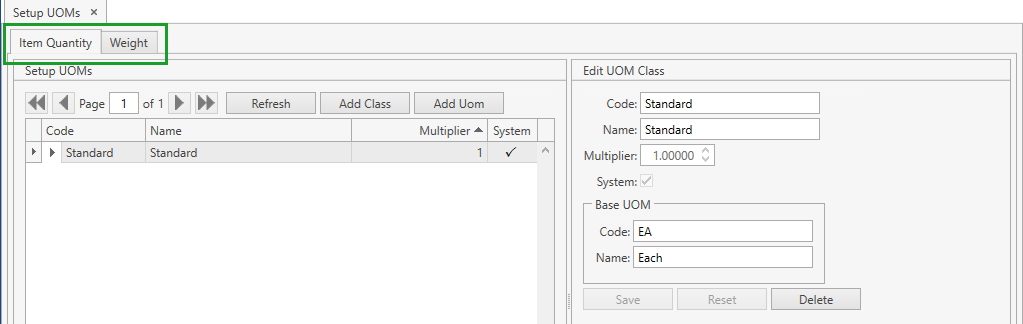
The system supports two UOM categories:
- Item Quantity
- Weight
You can switch between them:
UOM operations are the same for both categories - you can add, edit and delete UOM classes and UOMs within these classes.
UOM Class
Add
Option 1
- Select UOMs menu item from Setup tab of the main menu.
- Select a UOM category (Item Quantity or Weight) you want to add a UOM class to by clicking on the necessary tab:
- Click Add Class button. The following frame will show up:
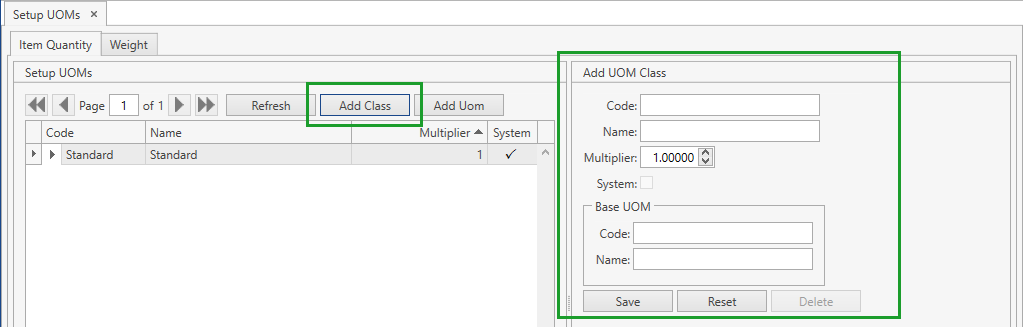
- Specify the necessary attributes.
- Code for UOM class and Code for base UOM are required.
UOM class must have a base UOM. All other non-base UOMs of this UOM class can be converted to the base UOM using predefined UOM multiplier. Please view Multipliers section for the conversion formula.
- Click Save button.
- Click Reset button if you want to cancel adding of a new UOM class.
Option 2
- Select Add Class menu item from Setup tab of the main menu. The following window will show up:
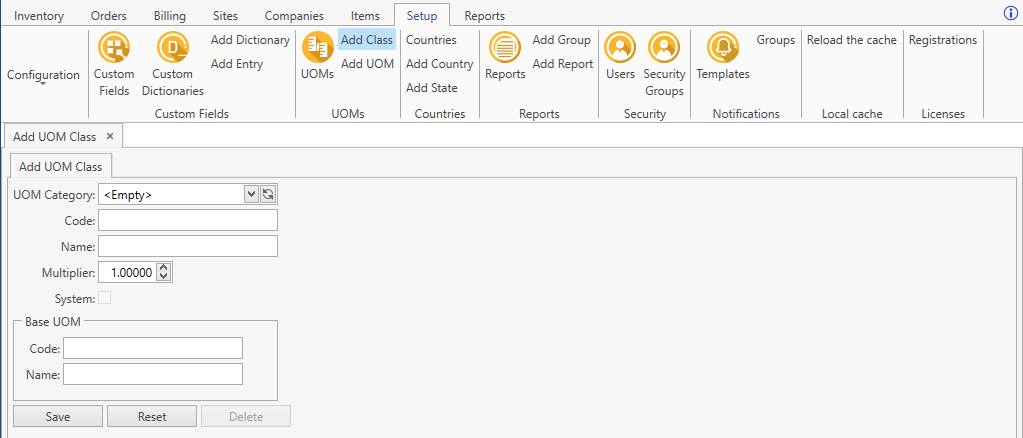
- Specify the necessary attributes.
- UOM category (Item Quantity or Weight), Code for UOM class and Code for base UOM are required.
- Click Save button.
- Click Reset button if you want to cancel adding of a new UOM class.
Edit
- Select UOMs menu item from Setup tab of the main menu.
- Click on the necessary UOM class. You can edit it within the following frame:
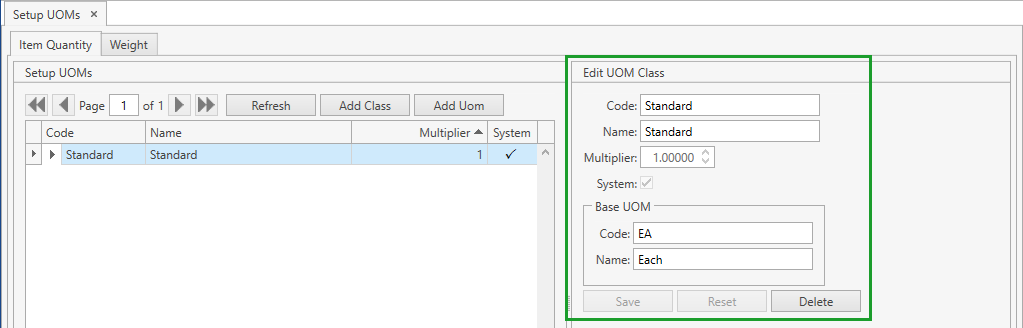
- Edit the necessary attributes.
- Click Save button.
- Click Reset button if you want to reset the unsaved changes.
Delete
- Select UOMs menu item from Setup tab of the main menu.
- Click on the necessary UOM class. You can delete it within the following frame:
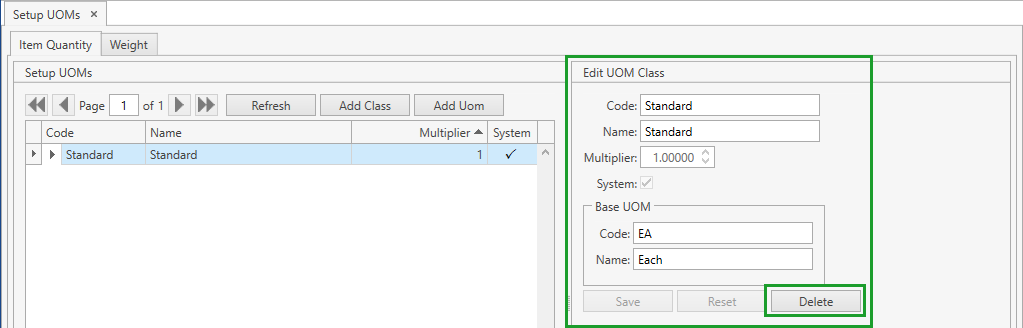
- Click Delete button.
Note. You cannot delete a UOM class:
- if it is marked as System;
- if it has items associated with it (that means that this UOM class is specified as Quantity UOM Class for at least one item).
UOM
Add
You can add as many UOMs to a UOM class as you might need.
Option 1
- Select UOMs menu item from Setup tab of the main menu.
- Select a UOM category (Item Quantity or Weight) you want to add a UOM to by clicking on the necessary tab:
- Click on the necessary UOM class. Then click Add Uom button. The following frame will show up:

- Specify the necessary attributes.
- Code is required. Two or more UOMs that are identical by Code can be added to different UOM classes.
- Multiplier shall be greater than 0.
- Click Save button.
- Click Reset button if you want to cancel adding of a new UOM.
Option 2
- Select Add UOM menu item from Setup tab of the main menu. The following window will show up:
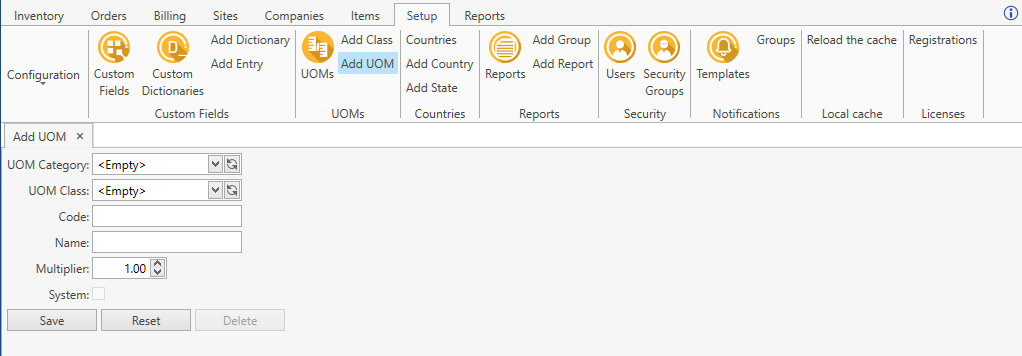
- Specify the necessary attributes.
- UOM Class and Code are required.
- Multiplier shall be greater than 0.
- Click Save button.
- Click Reset button if you want to cancel adding of a new UOM.
Edit
- Select UOMs menu item from Setup tab of the main menu.
- Click on the necessary UOM class whose UOM you want to edit and then click the button:
 .
. - Click on the necessary UOM. You can edit it within the following frame:

- Edit the necessary attributes.
- Click Save button.
- Click Reset button if you want to reset the unsaved changes.
Delete
- Select UOMs menu item from Setup tab of the main menu.
- Click on the necessary UOM class whose UOM you want to delete and then click the button: .
- Click on the necessary UOM. You can delete it within the following frame:
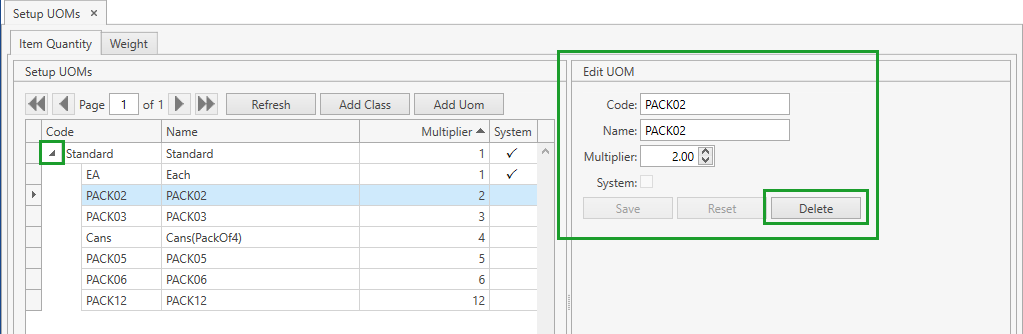
- Click Delete button.
Note. You cannot delete a UOM:
- if it is marked as System;
- if it is a base UOM of its UOM class;
- if it has items associated with it (that means that this UOM is specified as Default Purchase UOM and/or Default Sales UOM for at least one item).
Multipliers
UOM Multiplier can be used for converting quantities in non-base UOMs into quantities in a base UOM according to the following formula:
1 non-base UOM = (non-base UOM Multiplier / base UOM Multiplier) * 1 base UOM
UOM Multipliers can be overridden for a particular item - refer to Item UOMs section for more details.
Please note that when converting CoreIMS takes into account the value of the UOM multiplier that existed in CoreIMS at the moment of a stock/order line/order detail creation, e.g.:
You used to receive stocks of Item A from Vendor A in boxes of 4 EA, i.e. in BOX UOM (EA is a base UOM with multiplier 1, BOX has multiplier 4).
But after a while the vendor changed their packaging process and started to deliver Item A in boxes of 8 EA. It means that the multiplier for BOX would be changed to 8 in CoreIMS.
But for all stocks, order lines and details that were created in CoreIMS before the multiplier was changed, CoreIMS will use the previous value of the multiplier when converting quantities into a base UOM (i.e. the multiplier 4).
Example.
EA is a base UOM with multiplier 1, BOX has multiplier 4.
Stock 1 of Item 1 was created in BOX UOM with Qty equalling to 10.
Multiplier for BOX was changed to 8.
Stock 2 of Item 1 was created in BOX UOM with Qty equalling to 10.
The user performs Break UOM for Stock 1: Qty is recalculated into 40 EA (since these stocks are still "boxes of 4 EA").
The user performs Break UOM for Stock 2: Qty is recalculated into 80 EA.