Zone Types
Required Permissions
- Setup Sites
- ability to add, view, edit and delete Zone Types
Search Zone Type
- Go to Sites tab of the main menu.
- Select Zone Types menu item.

The following window will open up:
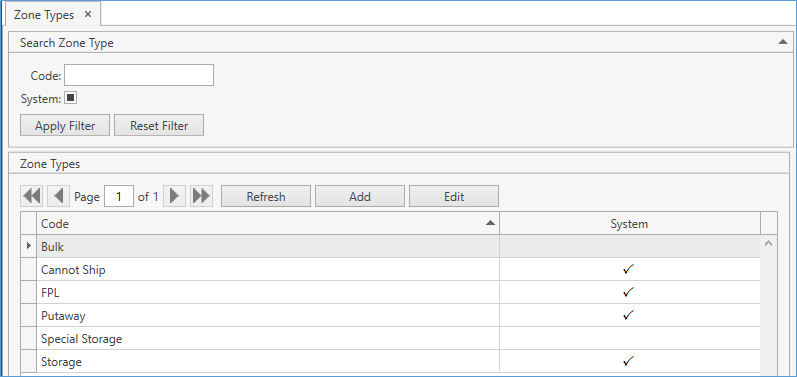
Some Zone Types are built-in, they're called system Zone Types:
- Cannot Ship – stocks residing in Locations within this Zone will not be selected during the allocation process. Also, no Location here can be selected as Site's Default Shipping Location.
- FPL – Forward Pick Locations Zone: Locations here will have the highest priority when allocating stocks during the automatic allocation process.
- Putaway – assign Locations here to designate Locations used in Receiving and Return Orders.
- Storage – Locations in this Zone are used to store stocks moved from Putaway and user-defined Zones.
You can always create new Types, these are the user-defined Zone Types.
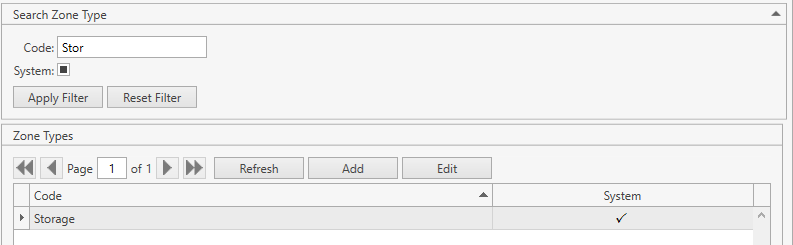
- Search the existing Types by Code. The System checkbox allows you to include/exclude system Types from filtering: by default, the checkbox corresponds to the indeterminate option, which shows you both system and user-defined Zone Types.
CoreIMS allows you to do the following when searching:
1) search by the beginning of text fields;
2) set checkboxes to one of three states for searching;
3) collapse/expand the filter area.
- Click Enter or Apply Filter button. The results that satisfy the search criteria will be loaded to Zone Types frame:
You can reset previously specified filter criteria by clicking Reset Filter button.
Use navigation buttons
 to switch the pages of the grid.
You can also customize the view of the grid and use Ctrl+F for searching.If needed, update the list of displayed Zone Types with the up-to-date data from the database by clicking Refresh button.
Click Add button to add a new Zone Type. Refer to Add Zone Type section.
Select a Zone Type and click Edit button or just double-click on it. Refer to Edit Zone Type section.
Add Zone Type
- Go to Sites tab of the main menu.
- Select Add Zone Type menu item:
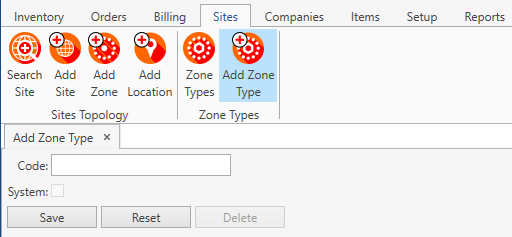
Note. Alternatively, you can access this window by clicking Add button in Zone Types window.
- Specify Code for a new Zone Type.
Zone Type Code must be unique: you cannot create two Zone Types with the same Code.
- Click Reset button to cancel adding of a new Zone Type.
- Click Save button to add a Zone Type. You will be redirected to Edit Zone Type window.
- Delete button is not available for Zone Types not yet created. It can only be used for already existing records.
Edit Zone Type
- Go to Sites tab of the main menu.
- Select Zone Types menu item.
- Select a necessary record, double-click on it or use Edit button. Modify Code:
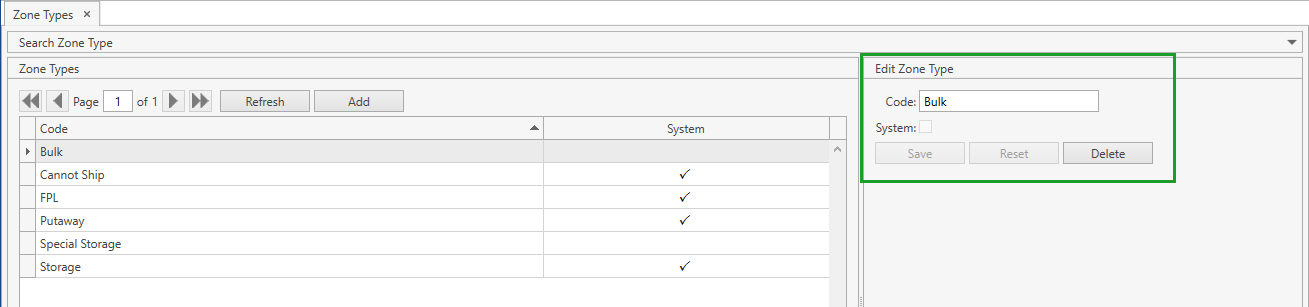
- Click Save button to save changes.
- Click Reset button to reset the form to the initial state.
- Click Delete button to remove the Zone Type record.
Notes:
- You cannot delete Zone Types marked as System.
- A Zone Type with actual Zones associated with it cannot be deleted as well.