Setup Reports
Required Permissions
- Setup Reports
- ability to add, edit and delete report groups
- ability to add, delete reports and edit their settings
View Reports Settings
Go to Setup section of the main menu.
Select Reports menu item.

The following window with report groups opens:
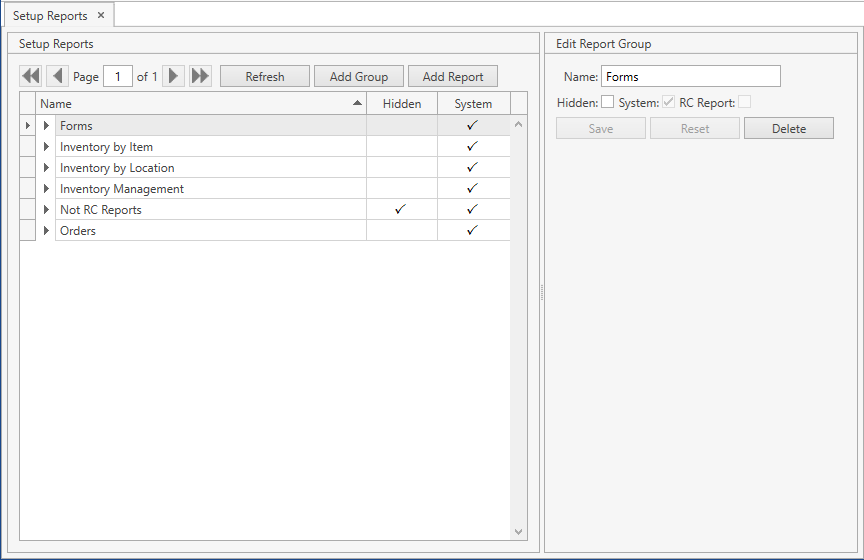
- Select a report group and click the button:
 . You will see reports that belong to the report group selected:

Use navigation buttons
 to switch the pages of the grid.
You can also customize the view of the grid and use Ctrl+F for searching.You can update the list of displayed report groups with the up-to-date data from the database by clicking Refresh button.
Report Group
Add
Option 1
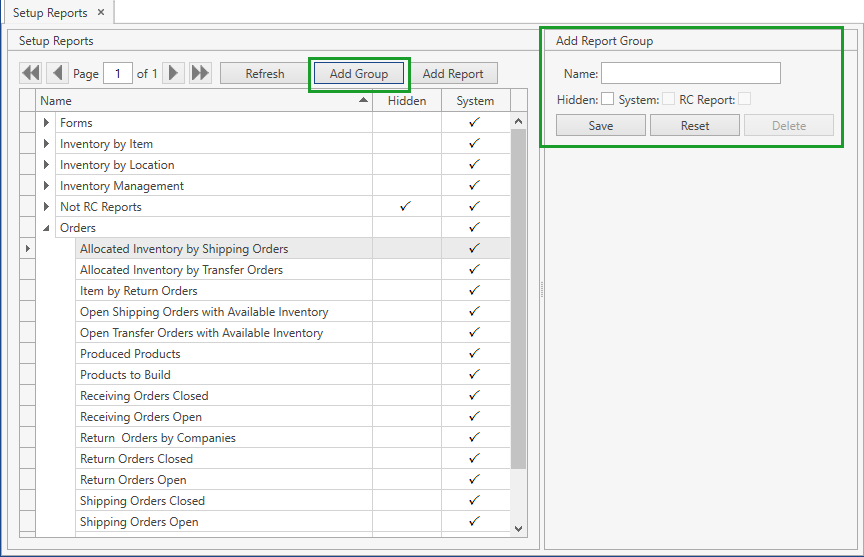
Select Reports menu item from Setup tab of the main menu.
Click Add Group button. The following frame will show up:
Specify the necessary attributes.
- Name is required.
- Hidden flag indicates whether a report group shall be hidden in Report Center or not.
Click Save button.
- Click Reset button if you want to cancel adding of a new report group.
Option 2
- Select Add Group menu item from Setup tab of the main menu. The following window will show up:
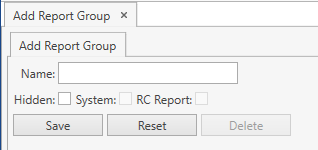
Specify the necessary attributes.
- Name is required.
- Hidden flag indicates whether a report group shall be hidden in Report Center or not.
Click Save button.
- Click Reset button if you want to cancel adding of a new report group.
Edit
- Select Reports menu item from Setup tab of the main menu.
- Click on the necessary report group. You can edit it within the following frame:

- Edit the necessary attributes.
- Click Save button.
- Click Reset button if you want to reset the unsaved changes.
- Click Delete button if you want to delete a report group.
Note. You cannot delete a report group:
- if it is marked as System;
- if it includes at least one report.
Report
The CoreIMS reporting tool is based on SAP Crystal Reports. CoreIMS allows you to add self-developed reports based on existing database fields.
Add
Option 1
Select Reports menu item from Setup tab of the main menu.
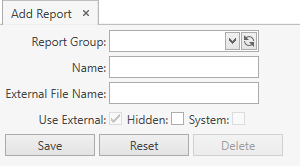
Click on the necessary report group you want to add a report to. Then click Add Report button. The following frame will show up:
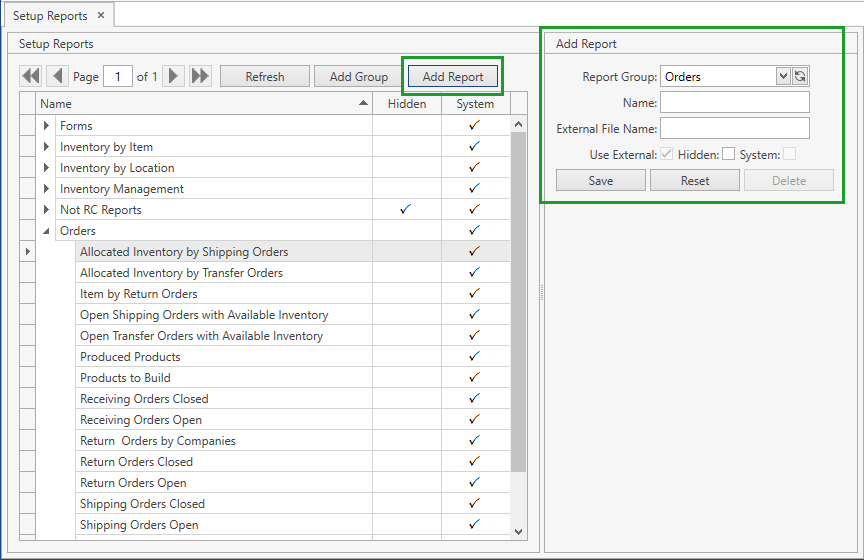
Specify the necessary attributes.
- Name and External File Name are required.
- External File Name – an .rpt file containing the report layout.
- Hidden flag indicates whether a report shall be hidden or not in the system.
Click Save button.
- Click Reset button if you want to cancel adding of a new report.
Option 2
- Select Add Report menu item from Setup tab of the main menu. The following window will show up:
Specify the necessary attributes.
- Select a report group you want to add a report to.
- Report Group, Name and External File Name are required.
- External File Name – an .rpt file containing the report layout.
- Hidden flag indicates whether a report shall be hidden or not in the system.
Click Save button.
- Click Reset button if you want to cancel adding of a new report.
Edit
- Select Reports menu item from Setup tab of the main menu.
- Click on the necessary report group whose report you want to edit and then click the button:
 .
. - Click on the necessary report. You can edit it within the following frame:
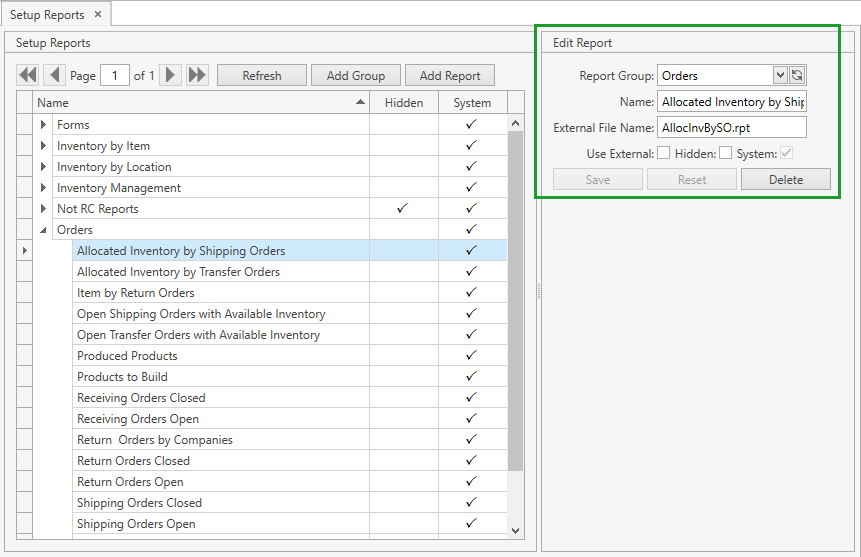
- Edit the necessary attributes.
- Click Save button.
- Click Reset button if you want to reset the unsaved changes.
- Click Delete button if you want to delete a report.
Note. You cannot delete a report if it is marked as System.